Airbnb DIY Photography Hacks for Amazing Professional Photos

Michael • May 10, 2023 • 8 min read

Airbnb DIY Photography Hacks for Amazing Professional Photos

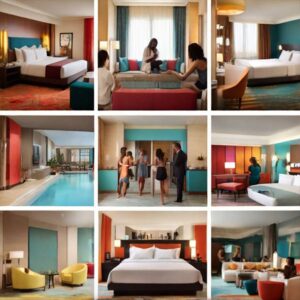
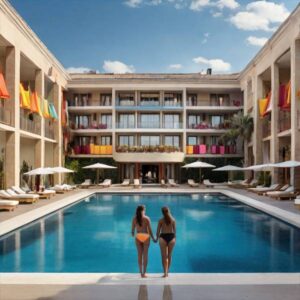
As I step inside this Airbnb, I am transported into a world of unparalleled beauty and luxury. The decor is on point, the lighting is perfect, and the ambiance is simply divine. But as a seasoned journalist, I know that behind every great Airbnb is a great photo, and that’s what we’re here to talk about today.

In this article, we’ll be discussing DIY photography hacks for creating stunning Airbnb photos that will make your listing stand out from the crowd. From camera basics to smartphone photography, we’ll cover it all. But this isn’t your average photography tutorial – oh no, this is a deep dive into the art and science of creating jaw-dropping images that will leave your potential guests salivating.

So buckle up and get ready to unleash your inner photographer, because by the time we’re done here, you’ll be a DIY photography pro. It’s time to take your Airbnb to the next level and create the listing of your dreams – let’s get started!


1. Understanding Your Equipment

When it comes to DIY photography, understanding your equipment is essential. Whether you’re using a smartphone camera or a high-end mirrorless camera, it’s important to know the basics of photography, as well as the recommended camera and lens options and essential camera accessories.

Understanding Your Equipment

A. Camera Basics

Aperture, shutter speed, and ISO are the three main factors that affect the exposure and overall quality of your photos. Understanding how each of these settings works can help you create stunning photos.

Aperture refers to the size of the opening in your lens that controls how much light enters the camera. It is measured in f-stops, with a smaller f-stop number indicating a wider aperture and more light entering the camera. A wider aperture creates a shallower depth of field, which can be used to blur the background and focus on the subject.

Shutter speed refers to the amount of time the shutter remains open when taking a photo. A faster shutter speed means less light enters the camera and is best used when taking action shots or in bright light conditions. A slower shutter speed, on the other hand, allows more light to enter the camera and can be used to create motion blur or capture low light scenes.

ISO refers to the camera’s sensitivity to light. A higher ISO setting makes the camera more sensitive to light and is best used in low light situations. However, a higher ISO can also introduce noise or graininess into your photos.

B. Recommended Camera and Lens Options for DIY Photography

When it comes to DIY photography, there are a wide variety of camera and lens options available, depending on your budget and specific needs. Here are a few recommended options:

Mirrorless Cameras – Mirrorless cameras are a popular option for DIY photography. They are lighter and more compact than DSLR cameras, making them more portable and easier to handle. Some popular options include the Sony A6000, Fujifilm X-T30, Canon EOS M50 and Nikon z50.

DSLR Cameras – DSLR cameras are a more traditional option for photography. They offer a wide range of lens options and typically have a larger image sensor, resulting in higher-quality photos. Some popular options include the Canon EOS Rebel T7i, Nikon D3500, and Pentax K-70.

Smartphones – Smartphone cameras have come a long way in recent years and can produce high-quality images. Popular options include the iPhone 14, Samsung Galaxy S23, and Google Pixel 7.

In terms of lenses, a wide-angle lens is a great option for capturing a wider view of your space. Some recommended options include the Sigma 16mm f/1.4, Sony E 10-18mm f/4 OSS, and Canon EF-S 10-22mm f/3.5-4.5 USM.

To learn more about cameras, you can find additional resources Dslr vs mirrorless camera.

C. Essential Camera Accessories

In addition to your camera and lens, there are a few essential camera accessories that can take your DIY photography to the next level.

  • Tripod – A tripod can help keep your camera steady and reduce camera shake, resulting in sharper photos. Look for a lightweight and sturdy option that is easy to transport.
  • Remote Shutter Release – A remote shutter release can come in handy if you want to take photos without touching the camera. This can help reduce camera shake and ensure sharper photos.
  • External Flash – If you’re taking photos in low light conditions, an external flash can help provide additional light and improve the overall quality of your photos.

Understanding your equipment is crucial for taking stunning Airbnb photos. Knowing the camera basics, recommended camera and lens options, and essential camera accessories can help you create high-quality photos that will make your listing stand out.

Taking Photos with a Smartphone

2. Taking Photos with a Smartphone

In recent years, smartphones have become a popular option for taking photos. With their convenience and advanced camera technology, smartphone cameras are a great option for DIY photography.

In this section, we’ll discuss how to take photos with a smartphone, including understanding the capabilities and limitations of smartphone cameras, choosing the right smartphone and camera app, and essential smartphone camera accessories.

A. Understanding the Capabilities and Limitations of Smartphone Cameras

While smartphone cameras have come a long way in recent years, they still have some limitations compared to high-end cameras. One of the main limitations is their smaller sensor size, which can result in less detail and less control over depth of field. Additionally, they often struggle in low light conditions, resulting in more noise or graininess in the photo.

However, smartphone cameras have some unique advantages, such as their convenience, portability, and advanced camera technology. Most smartphones now have multiple cameras, including wide-angle and telephoto lenses, allowing for a wide range of creative options.

They also often have advanced features such as portrait mode, which uses software to create a shallow depth of field and blur the background.

B. Choosing the Right Smartphone and Camera App for Your Needs

When it comes to choosing the right smartphone and camera app for your needs, there are a few factors to consider. Firstly, consider the camera specifications of your smartphone.

Look for a smartphone with a high megapixel count, a large aperture, and optical image stabilization for the best results.

Some popular options include:

  • iPhone 11, 12, 14
  • Samsung Galaxy S21, 22, 23
  • Google Pixel 5, 6, 7

C. Essential Smartphone Camera Accessories

While smartphone cameras are convenient, there are some essential accessories that can help take your DIY photography to the next level.

  • 1. Tripod – A tripod can help keep your smartphone steady and reduce camera shake, resulting in sharper photos. Look for a lightweight and compact tripod that is easy to transport.
  • 2. Lens Attachments – There are a wide range of lens attachments available for smartphones, including wide-angle, telephoto, and macro lenses. These can help you capture different perspectives and add more creativity to your photos.
  • 3. External Lighting – If you’re taking photos in low light conditions, an external lighting source such as a ring light or LED panel can help provide additional light and improve the overall quality of your photos.

Taking photos with a smartphone can be a great option for DIY photography. Understanding the capabilities and limitations of smartphone cameras, choosing the right smartphone and camera app, and investing in essential smartphone camera accessories can help you take stunning photos for your Airbnb listing.

DIY Photography Techniques for Airbnb Photos

3. DIY Photography Techniques for Airbnb Photos

Taking good photos is more than just having the right equipment. It also involves understanding the art of photography and how to use composition and lighting to create stunning images.

In this section, we’ll discuss some DIY photography techniques for taking great Airbnb photos, including creating a sense of depth and dimension, using props and decorative elements, and experimenting with different angles and perspectives.

A. Creating a Sense of Depth and Dimension in Your Photos

Creating a sense of depth and dimension in your photos can help make them more interesting and dynamic. This technique involves using foreground, middle ground, and background elements in your photo to create a sense of space and depth.

  • Leading Lines
    One way to create depth is by using leading lines. Leading lines are lines within the photo that lead the viewer’s eye into the image. For example, a hallway or a table runner can create a natural leading line that draws the viewer’s eye into the photo.
  • Framing
    Another way to create depth is by using framing elements. Framing elements are objects within the photo that create a frame around the subject. For example, using a window or a doorway to frame a bed can create a sense of depth in the photo.
  • Rule of Thirds
    Using the rule of thirds can also help create a sense of depth in your photos. The rule of thirds involves dividing the photo into thirds vertically and horizontally, creating a grid. The subject of the photo should be placed at one of the intersections of the grid to create a more interesting and dynamic composition.

B. Using Props and Decorative Elements to Enhance Your Photos

Using props and decorative elements can help add interest and personality to your Airbnb photos. Props can be used to highlight specific features of your space and add color and texture to your photos.

When using props, it’s important to choose items that are in line with the aesthetic and theme of your space. For example, if you have a rustic-themed Airbnb, using wooden crates or vintage suitcases can add a rustic touch to your photos. Alternatively, if your space is more modern, using metallic or glass props can add a modern touch.

Plants are another great prop to use in your Airbnb photos. Plants can add color and life to your photos and can also help make your space feel more inviting.

When using plants, make sure they are well-maintained and add to the overall aesthetic of your space. Check out our ultimate guide How to Stage Your Airbnb for Photos to get started!

C. Experimenting with Different Angles and Perspectives

One of the benefits of DIY photography is that you have more control over the angles and perspectives of your photos. Experimenting with different angles and perspectives can help you find the best composition for your photos and highlight the unique features of your space.

  • Shoot from a low angle
    One way to experiment with angles is by taking photos from a low angle. Taking photos from a low angle can make the space appear larger and can also highlight the details of the floor or ceiling. Conversely, taking photos from a high angle can create a more bird’s eye view of the space and can highlight the overall layout of the room.
  • Tilt your camera
    Another way to experiment with angles is by tilting the camera. Tilting the camera can create a more dynamic composition and can add interest to an otherwise simple photo. However, be careful not to overdo it, as too much tilt can make the photo appear off-balance.

DIY photography techniques can help you take stunning Airbnb photos. By creating a sense of depth and dimension, using props and decorative elements, and experimenting with different angles and perspectives, you can create more interesting and dynamic photos that showcase the unique features of your space. Read all about how to take Airbnb Cover Photos for your listing.

Editing Your Airbnb Photos for Maximum Impact

4. Editing Your Airbnb Photos for Maximum Impact

Editing your Airbnb photos can take them from good to great. Post-processing involves adjusting the exposure, cropping, color correction, and other factors to enhance the overall look and feel of your photos.

In this section, we’ll discuss post-processing basics, recommended photo editing software and apps, and tips for creating a consistent look and feel across all photos.

A. Post-processing Basics

When it comes to post-processing your Airbnb photos, there are a few key factors to consider. Firstly, adjust the exposure of the photo to ensure it is properly lit.

  • Overexposed photos can appear too bright and washed out, while underexposed photos can appear too dark and lack detail. Adjusting the exposure can help bring out the details and colors of the photo.
  • Cropping is another important factor to consider when editing your Airbnb photos. Cropping can help remove distracting elements from the photo and create a more focused composition. Additionally, cropping can help highlight specific features of your space, such as a unique piece of furniture or a stunning view.
  • Color correction is also an important factor to consider when post-processing your Airbnb photos. Adjusting the color temperature and saturation can help create a more balanced and visually appealing photo. Be sure to adjust the color temperature to match the lighting conditions of the photo, and use saturation sparingly to avoid oversaturating the colors.

B. Recommended Photo Editing Software and Apps

There are a wide range of photo editing software and apps available for post-processing your Airbnb photos. Some popular options include Adobe Lightroom, Photoshop, and Canva.

These software and apps offer a wide range of editing tools, including exposure adjustment, color correction, and cropping, as well as preset filters to help create a consistent look and feel across all photos.

Additionally, there are a range of mobile editing apps available, including VSCO, Snapseed, and Lightroom Mobile. These apps offer many of the same editing tools as desktop software and can be a convenient option for on-the-go editing.

C. Tips for Creating a Consistent Look and Feel Across All Photos

Creating a consistent look and feel across all of your Airbnb photos can help create a cohesive and visually appealing listing. Here are a few tips for creating a consistent look and feel across all photos:

  • Use the same editing style across all photos – Choose a specific editing style, such as a warm or cool tone, and apply it consistently across all photos. This can help create a cohesive and professional look to your listing.
  • Maintain consistent lighting – Use consistent lighting conditions when taking photos to ensure that all photos have a similar look and feel. This can help create a more polished and professional listing.
  • Use a grid system – When taking photos, use a grid system to ensure that all photos have a similar composition. This can help create a more cohesive and visually appealing listing.
  • Consider using presets – Presets are pre-made editing filters that can be applied to your photos to create a consistent look and feel. Consider using presets to help create a cohesive look to your listing.

Post-processing your Airbnb photos can help take them from good to great. By adjusting the exposure, cropping, and color correction, and using recommended photo editing software and apps, you can create stunning photos that showcase the unique features of your space.

Additionally, by following tips for creating a consistent look and feel across all photos, you can create a cohesive and visually appealing Airbnb listing. Find eve more Airbnb photo tips here.

5. Conclusinon

We’ve covered DIY photography hacks for taking stunning Airbnb photos. We started by discussing the importance of good equipment and understanding your camera, including camera basics, recommended camera and lens options, and essential camera accessories.

We then delved into taking photos with a smartphone, including understanding the capabilities and limitations of smartphone cameras, choosing the right smartphone and camera app, and essential smartphone camera accessories.

Next, we discussed DIY photography techniques for creating stunning Airbnb photos, including creating a sense of depth and dimension, using props and decorative elements, and experimenting with different angles and perspectives.

Finally, we covered editing your Airbnb photos for maximum impact, including post-processing basics, recommended photo editing software and apps, and tips for creating a consistent look and feel across all photos.

Now that you’ve learned these DIY photography hacks, it’s time to put them into action! Start by using these techniques to take stunning photos of your Airbnb space, and see the difference it makes in attracting guests.

We also invite you to share your own DIY photography tips and tricks in the comments section below. By sharing your experiences and knowledge, we can all learn and grow together as Airbnb hosts.


References that you may find helpful:

What are your Airbnb DIY Photography Hacks? Let us know in the comments.

By Furoore team member Michael
Furoore Team is here to assist you in capturing the most significant moments in your life. To create exciting photographs, discover photography guides, find unique photo ideas, and limitless image inspiration.

.

Related Articles

Your thoughts and questions

Leave a Reply

Your email address will not be published. Required fields are marked *