Camera Mode Settings Explained for Beginners
Michael • updated June 30, 2022 • 9 min read
Michael • updated June 30, 2022 • 9 min read

Digital camera modes are important for controlling exposure in photography. You should know what each camera mode accomplishes and when to use it, regardless of your skill level as a beginner photographer.
This camera modes tutorial explains the main modes found on most digital cameras. This includes auto modes, manual settings, and semi-automatic modes, as well as when to apply them.
Content
As a photographer, you can use the camera mode to control specific elements of a shot. Some of these are the shutter speed, the aperture, and the ISO value.
Some camera modes take care of these settings automatically, while other modes let you change them yourself.
Modern cameras often have a system that takes care of the exposure for you. The aperture and the shutter speed are automatically set to work well together, so you can get the best exposure.
For automatic exposure control to work, the camera needs to have a built-in light meter, which is standard on all new cameras.
You can automatically set different values. When you set both the aperture and the shutter, the setting is called “program automatic.”
This means that the camera takes care of everything on its own. It is called “aperture priority” if only the aperture is set and the camera sets the shutter speed itself. If needed, the settings can be changed by hand.
Most compact cameras only have an automatic setting, so you can’t change anything by hand. Most DSLR cameras and mirrorless cameras have more settings to choose from, and they can be automated if you want.
In older cameras, you have to set the aperture and shutter by hand after the light has been measured.
In the past, there have been no modes for a camera. Everything was done by hand. Photographers used to carry light meters with them and use the readings to change the lighting and intensity of the scene. Today, it’s much easier to take photos.
The first camera with a built-in light meter was made by Kodak in 1938. The first DSLR camera was made by the Japanese company “Topcon” in 1962.
After that, people didn’t need to carry light meters anymore. Over time, new camera modes were made, and modern cameras have a variety of modes for different circumstances.
Let’s discover the five main camera modes, which you will find in all well-known camera brands. You are ready to go with these common camera modes
Depend on the camera manufacturer the various modes are labelled differently, but all show a green color Auto mode symbol:
Quite self-explanatory. The most simple mode to use is Auto Mode, which allows the camera and its technology entire control of all exposure settings.
When you aim your camera outdoors on a sunny day, the camera might determine that a small aperture of f/16, a shutter speed of 1/300th of a second, and an ISO value of 4200 are needed.
Move your camera in the opposing direction and see what it decides is best for the circumstance. Although Auto Mode is wonderful for novices, it is recommended that you graduate from it as soon as feasible.
If you like to develop your own photography style, should stay far away from the Auto mode, as the camera will set all exposure settings for you, you will be just left with the composition of the photo only.
And, more often, when presented with a difficult lighting scenario, your camera will have no idea what to do. Using Auto Mode exclusively can stifle your photographic progress.
The P program mode is identical to Auto mode the shutter speed and aperture settings are controlled by the camera, but still, the photographer can alter other settings manually.
P mode is identical to Auto mode, your camera chooses the aperture and shutter speed based on the quantity of light getting through the lens. The photographer can adjust other settings manually This setting is great for taking rapid, routine shots.
The camera attempts to reach a compromise between aperture and shutter speed. Depending on the intensity of the light, the two settings are increased or decreased.
If you aim your camera at a brighter region, for example, the aperture will be reduced to retain a reasonably fast shutter speed.
This mode gives you very little influence over your exposure. You can “override” the predicted shutter speed and aperture by turning the camera’s dials.
When you rotate the dial to the left, the camera reduces the shutter speed and raises the aperture.
When you rotate the dial to the right, the camera boosts the shutter speed while decreasing the aperture. Basically, if you need a higher shutter speed, adjust the dial to the right, and if you ever need extra depth of focus, flip the dial to the left.
Program (P), Shutter Priority (Tv or S), and Aperture Priority (Av or A) are the three most typical semi-automatic camera modes. These modes enable you to concentrate on your photoshoot while leaving the majority of the settings to the camera computer.
Keep reading to know much more about the three semi-automatic modes and the other standard candidates on the dial.
In Shutter Priority mode, you manually set the shutter speed of the camera, and this camera mode then automatically selects the correct aperture.
This happens based on the amount of light passing through the lens. Shutter priority mode is best when you want to “freeze” motion in the image or intentionally blur it.
If there is too much light, your camera will automatically increase the aperture to a higher value. This reduces the amount of light. If there is not enough light, your camera will automatically decrease the aperture to a lower value, allowing more light to pass through the lens.
In Shutter Priority mode, the shutter speed remains as you set it. The aperture, however, is automatically increased or decreased depending on the amount of light.
There is a high chance that this camera mode will generate overexposed or underexposed photos. If the amount of ambient light is not enough and you have the shutter speed at a really high value, your exposure will be limited to the aperture of your lens.
So if the maximum aperture of your lens is f/4.0, for example, your camera can’t use a lower aperture than f/4.0 and still take the fast shutter speed you set manually.
In Aperture Priority mode, you can manually set the lens aperture while the camera chooses the appropriate shutter speed. You can freely change the aperture of the lens and experiment with the depth of field.
When the scene is too bright, the camera will automatically raise the shutter speed. The shutter speed is also automatically reduced in low-light settings by the camera. With this camera mode, the chance of overexposing or underexposing a photo is quite low.
The shutter speed on most cameras is between 30 seconds to 1/4000 or even 1/8000th of a second, which is more than enough for most lighting scenarios.
We suggest using aperture priority mode since it gives you complete control over the depth of field. Under usual shooting conditions, the image is guaranteed to be correctly exposed.
Manual mode, as the name implies, allows for complete manual control of the aperture and shutter speed. With this camera mode, you will be able to manually adjust the aperture and shutter speed.
In this camera mode, you will be able to manually adjust the aperture and shutter speed. For example, in a very bright image, your camera may misinterpret the exposure and over or underexpose the remaining image.
In that situation, you can still go to manual mode and kinda “override” the exposure by your own settings.
This camera mode is also highly suited for panoramas. For panoramas, you must use the same shutter speed and aperture for each shot. Otherwise, some photographs will be darker than others.
Dial-in the settings for the shutter speed and aperture in manual mode, so that all of your photos will get the same exposure.
In most DSLR and mirrorless systems, shooting modes reside on a dial situated on top of the camera. This dial will be marked with abbreviations indicating the different modes.
Other cameras, including many point-and-shoot systems, might require you to set the shooting mode via a digital menu on an LCD instead of a physical dial.
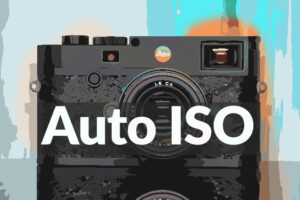
With most cameras, the ISO value does not change automatically in the camera modes mentioned, so you have to set it manually.
If you don’t want to set the ISO manually all the time and you conveniently have an “Auto ISO function” in your camera, it’s best to activate it right away.
Set the maximum ISO to 800-1600 and the minimum shutter speed to about 1/200 seconds. If you notice too much noise in the image, change the maximum ISO value to a lower value.
If your camera doesn’t have an auto ISO function, generally set the value to the lowest number and increase it only in low light conditions.
Many cameras feature additional modes that serve special conditions in addition to the four standard shooting modes. These are merely combinations of the major shooting modes, with additional parameters designed to make the user’s life easier.
Most photographers do not use these other modes and instead stick to the four major modes.
However, for new photographers using entry-level cameras, these specialty modes can be a good starting point for exploring some popular photographic genres.
These extra modes, which may be displayed differently on different cameras by different icons, may include:
Manual mode on many cameras also activates the Bulb function. In bulb mode, the shutter remains open as long as the shutter button is pressed. To accomplish this, you must extend the exposure period above the standard maximum of 30 seconds.
Selects settings that are optimized for capturing portraits of human subjects. A shallow depth of field may be intended to make the person stand out against a backdrop. In addition, the camera may attempt to improve skin tones and hair texture.
For shooting subjects that move quickly. To capture clear photographs with as little motion blur as possible, the camera will utilize a quicker shutter speed and may open up the aperture to enable the fast shutter speed and blur the backdrop.
Wants to enhance the depth of field to capture clear details in a landscape from close to the camera too far out in the distance. The camera may use processing to achieve vibrant colors and clarity.
Attempts to take natural-looking photographs of human people in low-light situations. In general, the camera will release a flash while using a slower shutter speed to fully illuminate the subject while also properly exposing any light sources in the backdrop.
Selects the best settings for photographing small objects at close range. Some cameras use a small aperture to increase the depth of focus, while others use a big aperture to blur the backdrop.
Beginner Photography Sections
» How to start Photography
» DSLR or System Camera
» Aperture
» Shutter Speed
» Camera ISO
» Exposure
» White Balance
» Histogram
» Camera Modes
» Camera Focus Modes
» Sharp Images
» Composition – Rule of Thirds
» Photography Mistakes to avoid
» Important Tips for Beginners
There is no single right answer to this question because the various modes are meant to regulate diverse shooting scenarios.
DSLR cameras are now incredibly sophisticated, with integrated computer systems that are regularly updated with advanced algorithms, taking the hassle out of mastering the more advanced techniques..
It’s always essential to look into the modes directly on the camera of your choice since you’ll usually find your preferred option quite fast after trying them all out.
When using a new camera, it’s generally best to just choose the Auto mode (or Program Auto) to get started shooting as soon as feasible.
This is a fiercely discussed topic, with purists preaching the advantage of shooting completely manual and more modern shooters dismissing old-school ideals in favor of just choosing a working style that suits the subject matter at hand.
Commercial photographers typically shoot in manual mode because they are frequently working to a specification that demands them to control anything seen in the final photo. wedding, street, sports, and documentary, and also photographers usually favor a semi-automatic option because it allows them to keep a coherent and cohesive perspective while yet letting them snap photographs rapidly if necessary.
As with most issues of this nature, there is no quick and clear solution other than what could work best on a case-by-case basis.
Don’t forget to share this article!
Related Beginner Articles
Beginner Photography

Beginner Photography
Beginner Photography
Beginner Photography
Your thoughts and questions