The Dark and Moody Food Photography Tutorial
Silvain • updated February 18, 2023 • 8 min read
Silvain • updated February 18, 2023 • 8 min read
Dramatic, dark, and atmospheric – that’s probably the best way to describe the style of Dark & Moody food photography. The trend toward seductive shots with their deep shadows and bright color accents has become a permanent feature of the food photography scene in recent years and continues.
Content
» Listen
The style of Dark & Moody food photography can best be described as dramatic, dark, and atmospheric. In recent years, the trend toward sensuous photos with deep shadows and brilliant color accents has been a staple of the culinary photography scene and is still going strong.
But what exactly is the dark and moody aesthetic, and how can you incorporate it into your own food photography?
In food photography, there are usually two styles: light and airy or dark and moody. Light and airy photos are often characterized by soft lighting and well-lit subjects. This style is the most used (especially in commercial photography) as it is perfect for showing all the elements of the food.
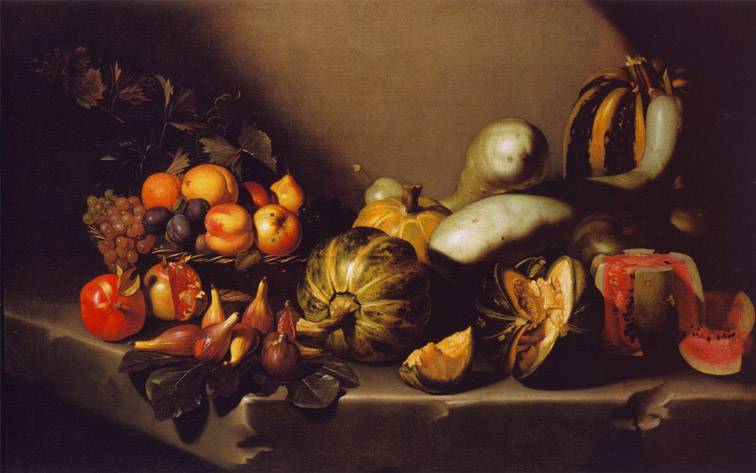
The dark and moody style, on the other hand, has a painterly component. This style uses the Chiaroscuro technique. Chiaroscuro is an Italian term that originally comes from painting and means nothing more than “light-dark”.
The term refers to the strong contrast between shadow and light in the painting. The technique leads the viewer’s eye to a specific area in the photo, to the hero of the photo – in our case, the food and creates a dramatic mood. This technique can be found in many paintings, for example, by Caravaggio, Rembrand, Vermeer.
Moody food photos thrive on rich contrasts and pronounced depths in the image. When it comes to setting the light, this means not just pointing, but highlighting or darkening specific areas in the image.
You can take more advanced food photos with any DSLR or mirrorless camera. More important would be the lens choice. In general, I recommend a fast fixed focal length in the 50-100mm range for food photography, preferably a macro lens.
The lens should have an aperture of f/1.8 or f/2.4. This is a great way to bring out the details of food when photographing from the front or from an angle. You achieve perfect background blur and the foreground subject has a great presence in the picture.
As a rule, in dark and moody food photography, it is recommended to slightly underexpose the image in the camera. This way, you retain detail without the risk of blowing out highlights and shadows.
Using a tripod will undoubtedly help your food photography. A tripod can feel restrictive at times, especially if you want to shoot from multiple angles. My advice is to test numerous angles with your camera to get some ideas and then arrange your tripod to catch the specific angles that will work.
It is also recommend using the timer or a remote shutter release – this will prevent camera shake and blurry/obscure images.
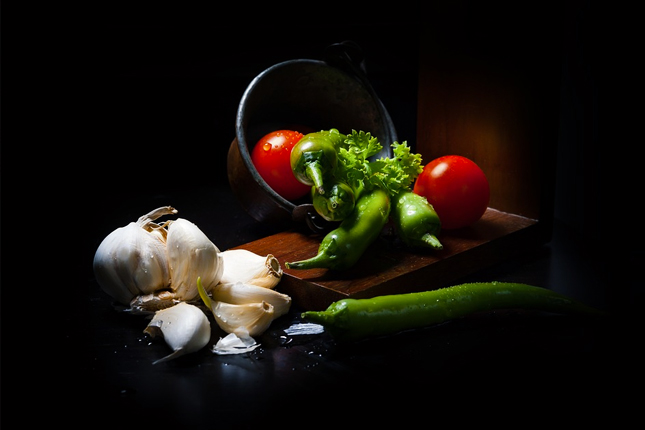
Almost all food motifs are suitable for dark photos. However, you should consider what story and mood you want to create with your photos. A summer salad or a light yogurt smoothie might not fit into a dark, heavy background. A winter stew or meat dish would be more appropriate.
For beginners, cold dishes are perfect for dark and moody food photography. This gives you enough time to play with the lighting conditions and try out different perspectives.
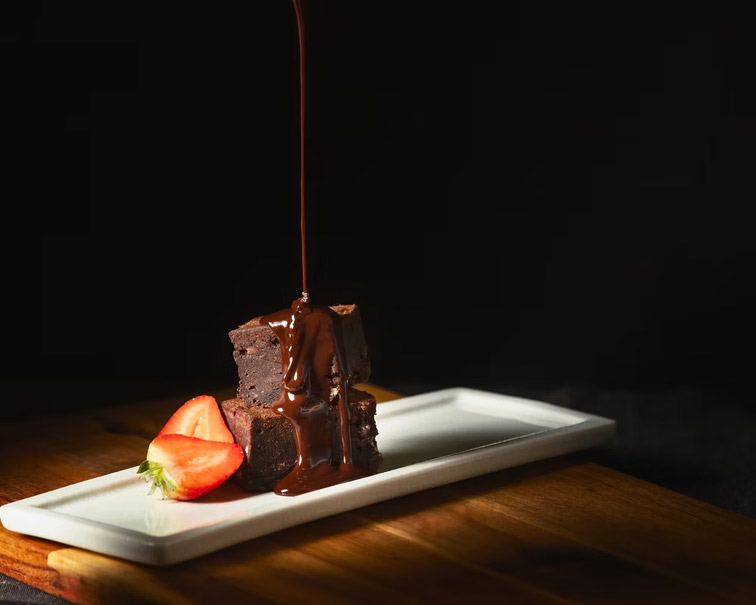
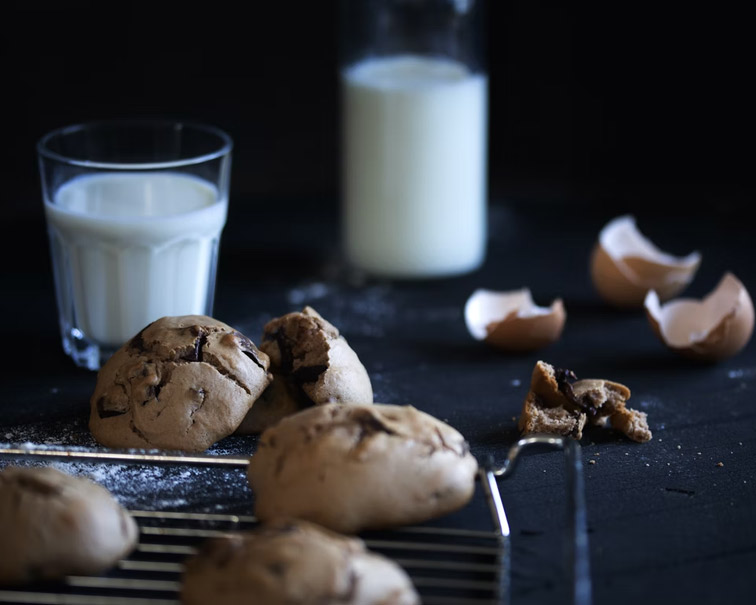
By the way, chocolate recipes always look especially sensual in dark and moody photos. Here you can again play with the different textures of chocolate. With a cake, it is rather rough, and with tender-flowing chocolate, the surface is smooth and soft.
In dark and moody food photography, we definitely don’t want the dish to look artificial and sterile. Rather, you should think you could immediately sit down at the table and grab it. To that end, we do just that with our delicious models: grab it.
Crumbs scattered across the table, crumpled napkins, used cutlery, and half-eaten food create liveliness. However, you should not overdo it. Otherwise, it will quickly no longer look appetizing. Controlled chaos is the motto here.
Think about what dish you want to photograph. Maybe it’s breakfast or a family dinner at the table or a late-night dinner, maybe a dish of some international cuisine.
Remember that everything in photography should be logical. Think about how you would serve this dish in life. Tell a story with the help of a camera.
Add some details, such as fresh ingredients, a napkin, mini herbs, or cutlery. You can also take minimalist photos, they look modern.
The optimal shooting angle depends on the “model” and the purpose. For flat dishes, e.g. pizza, soups, or bowls, an angle of 45°- 90° (from above) is good to show their filling.
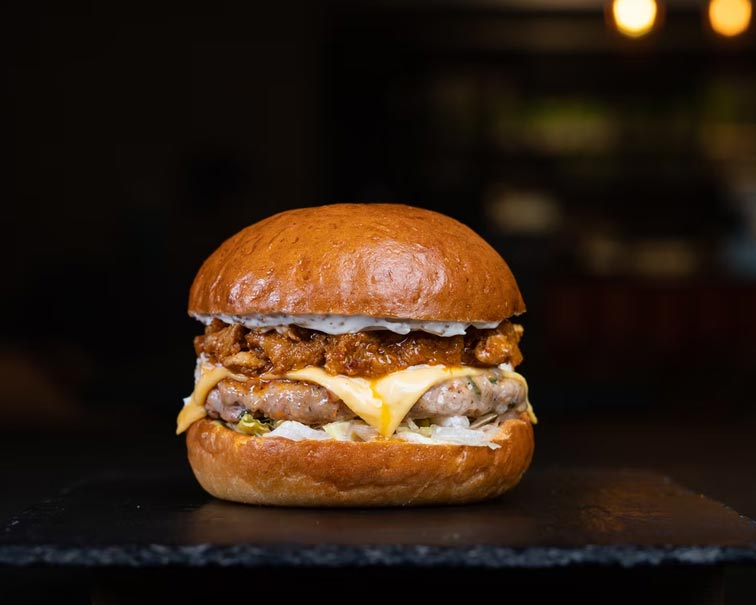
For drinks, sandwiches, burgers, or cakes, an angle of 0 – 20° is desirable. It provides a possibility to show all the layers. This means that the camera should be approximately at the same height as the object.
Carefully analyze the characteristics of the object before starting work and choose the appropriate angle.
As mentioned earlier, I like to underexpose my photos a bit on purpose for dark and moody food photos. Later, in post-processing in Lightroom, you can then highlight only selected areas.
Use a wide-open aperture, with a small f-stop, like f/2.4 or f/2.8 to get a nicely blurred background, and the subject will stand out.
A tripod is also a good choice; otherwise, you might get blurry images.
Not all black is the same. I often find that I’m not happy with a look until I’ve played around with the white balance a bit. Whether your black has a cool or warm undertone can make a huge difference.
That’s why it’s best to play around with the white balance sliders early in the shoot. For me, this step is essential. If the image doesn’t have the right tone, it can make the difference between the success and failure of a shoot on a bad day.
A great way to check if the food model is well aligned in your composition is to use the rule of thirds. This is very often used in photography to compose an image in an appealing way.
How does it work? The image is visually divided into two horizontal and two vertical lines, thus dividing it into nine equal parts. The main subject should be placed at one of the four intersections, or alternatively, along the lines.
I have very large, bright windows and white walls in my studio, which makes taking Dark & Moody food photos harder. That’s why I use black cardboard, shutters, and curtains to reduce ambient light.
You can additionally place a black piece of styrofoam across from the light source to keep the light from reflecting on the subject. This is called “negative fill,” and you get nice low-light shadows.
With props, like plates, cutlery, napkins, etc, you can make the photo dark and moody. For this, you can use dark and matte plates, so that your main object, the food, comes into the foreground and thus gets the full attention.
If you use shiny plates or cutlery, you may end up with unsightly reflections in your photos that don’t fit the dark and moody look.
Also, be careful with mirror-like elements and very reflective materials. It’s possible that you’ll have trouble getting your photos lit evenly.
For your Dark & Moody photos, use predominantly dark backgrounds and bases. Dark wood, an old baking tray, or other dark browns, blues, or grays, for example. The majority of your props should be black and matte.
According to the rule of thumb, anything bright in your photographs will later attract the viewer’s attention, so stick to the rule of thumb.
Your subject should be the brightest element in your photograph. Because of the dark environment, it draws the viewers’ attention to itself.
If you don’t want your attention drawn away from your subject by a white plate in the background, use cutlery in dark tones instead.
If you want to draw attention to specific areas of your image, use lighter elements. You may also use it to create nice contrast within a dark picture.
The background does not always have to be black. Here you can choose dark wood, slates, or a textured black, like tea towels or linen tablecloths.
Light is the most important factor of all – without light, no photos. Light and its manipulation are a fundamental key to Mystic Light Photography. Whenever possible, I try to take food photos only in natural daylight.
I already mentioned the optimal angle of incidence from diagonally behind in the setting above, as well as the fact that for dark and moody photography, which lives by light-dark contrasts, somewhat harder light is also desirable.
Use only one light source for your dark and moody photography. Consider a single window. Blinds or curtains should be used to block out all other light sources. This will result in a more dramatic lighting environment with deeper shadows.
I propose lighting your subject from behind or to the side for enticing shots with clean edges, precise curves, and stunning highlights. By the way, this rule applies to food photography photographs in general, not just dark and moody ones.
This light direction emphasizes the edges, structures, and textures of your subject and makes it stand out more from the background, making it appear much more vibrant.
It’s crucial to manage the light in dark and moody images to achieve the desired mood. Use a diffuser (or a thin white curtain) to soften the light if the sun is shining too brightly through your window.
Instead of a bright filler board on the opposite side of your light source, you can place dark, black cardboard or similar object on the opposite side. This absorbs the light and makes the shadows darker.
In addition, use cardboard or something similar to screen the light in specific portions of your set that should be dark in your later photo. This way, your photo may merely have a single, thin tunnel of light that appears to flow across your main subject.
If you edit your RAW files in Lightroom (you do shoot RAW, OR?), you can further enhance the dark and moody vibe with a few clicks on the right slider.
From boosting vibrancy to adjusting contrast, Lightroom food presets are the toolkit every food blogger needs. They streamline the editing process, ensuring each photo is both authentic and enticing.
The Correction Brush, for example, helps you lighten only the food in the photo while leaving the surrounding area dark.
The intensification of the shadows and highlighting of individual colors then follows in the image processing. Here you can make local adjustments to increase or decrease the exposure of individual areas and adjust the brightness and color contrast.
You can further enhance this effect by using a vignette. It makes the corners darker and highlights the center area of the image.
The white balance should be set a little cooler (i.e. more bluish) for dark and moody photos because, with a yellow undertone, dark photos quickly look old-fashioned and musty.
Dark and moody food photography can add depth and drama to an image, creating a visually stunning and captivating effect. By using shadows and lighting, a photographer can create a sense of ambiance and mood that can make the dish more appealing to the viewer.
Techniques to create a dark and moody atmosphere in food photography can include using low key lighting, shadows, and carefully selected props to enhance the overall effect. By controlling the depth of field and playing with exposure, a photographer can create an image that is both intriguing and moody.
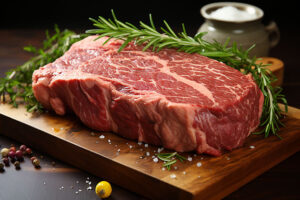
Foods that have a bold, rich color and a strong visual presence are typically the best suited for dark and moody food photography. This can include dishes such as steak, chocolate, and deep red wines.
Color grading can have a significant impact on the mood and tone of dark and moody food photography. By adjusting the color balance, saturation, and contrast, a photographer can create a variety of moods and effects, ranging from warm and inviting to cool and dramatic.
Common challenges in dark and moody food photography include the difficulty in balancing the lighting and shadows, selecting the right props and backgrounds, and controlling the depth of field to create the desired effect. It can also be challenging to get the food to look its best while still capturing the desired mood and atmosphere.
Lighting is an essential component of dark and moody food photography. By carefully controlling the light sources and shadows, a photographer can create a sense of depth and atmosphere that can make the food more visually appealing. A variety of lighting techniques can be used, including softboxes, reflectors, and diffusers, to create the desired effect.
Dark and moody food photography is great, but it takes practice to create the mood you want.
With rustic accessories, vibrant food styling, purposeful manipulation of light and shadow, and editing that enhances contrasts, you should already be able to achieve a nice mystic light effect.
As in all creative disciplines, however, there are no real rules. Everyone has different ideas and usually several ways to achieve the goal.
This article only serves as an incentive to experiment for yourself and perhaps discover the dark and moody side of food photography.
Further readings:
World famous black beans
Dark Chocolate Bourbon Balls
Dark Chocolate Raspberry Truffles
Natural Food Coloring: How to Make Homemade Food Dyes
Dark Chocolate Zucchini Cake Waffles
Related Articles
Food Photography Hashtags and Quotes
Food Photography
Food Photography
Food Photography
Your thoughts and questions