15 Creative Tips for Food Photography Blogger
Silvain • updated June 21, 2022 • 8 min read
Silvain • updated June 21, 2022 • 8 min read

Surely you’ve already published a food post or two on Instagram or tempted your followers in your stories with a huge burger or a delicious slice of cake. We’ve compiled a list of tips on food photography for bloggers and prospective bloggers just for you.
Beautifully photographed food makes almost everyone go weak. On Instagram alone, there are around 286 million posts with the hashtag #foodporn (as of June 2022) and new ones are added every day.
Content
If you’ve decided to start posting food content to your Instagram feed or stories on a regular basis, you should first think about what direction you want it to go.
What do you like about the images: the bright or more pastel colors? Do you like the minimalist white dishes or are you a fan of colorfully decorated plates? Maybe unusual perspectives or special lighting conditions appeal to you in many pictures.
You shouldn’t try to recreate images, but a few suggestions will certainly help you prepare and come up with ideas.
In terms of preparation, you should avoid taking risks with difficult recipes in your early days as a food writer. Concentrate on recipes that you have already tried out. Otherwise, we recommend that you cook or bake the dishes on a trial basis beforehand.
Don’t take on too much in the beginning. First, cook an elaborate dish, then photograph it, and then clean up everything and edit the pictures at the end. That can be quite difficult, and in the end, you will be unnecessarily frustrated.
So it’s best to start small: cake, dessert, or smoothies. Something that already looks slightly unappetizing by nature, like your morning overnight oats, is not the best way to get started in food photography.
Any dishes that are more monochromatic are a good place to start. Wildly thrown-together bowls and salads are a little more challenging.
Cookies, cupcakes, and similar treats have the advantage that you can make them at any time and photograph them later. So you may bake it in the evening and shoot it the next day in a better light. In addition, cookies and the like last longer than salads, for example, which quickly wilt.
We asked ourselves: What exactly do food bloggers do differently? Why do they always look so great?
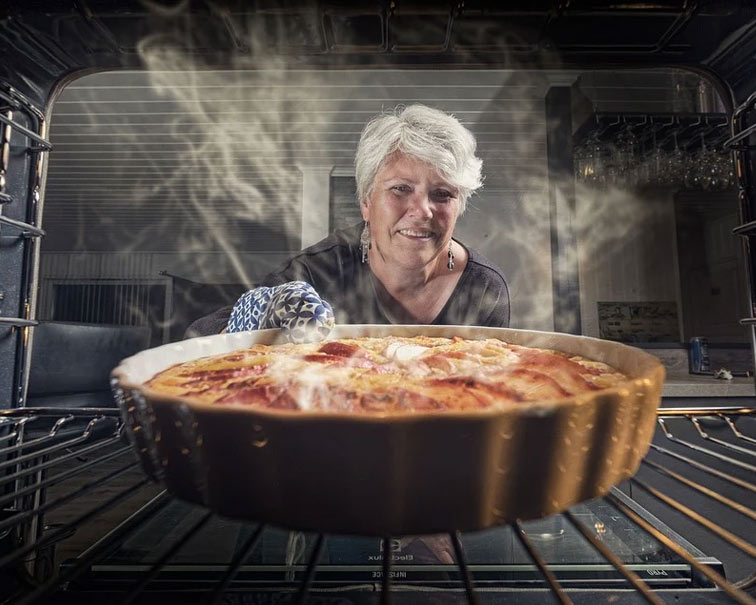
Daylight is ideal for making food look extra delicious. It’s best to take your photos by the window or even outside. However, you should be careful not to shoot in the blazing sun, as this will cause ugly shadows.
Perfect is a slightly overcast sky, then it is bright enough. If it has to be artificial light, use only one light temperature at a time. For example, mixing warm, yellowish light with cool white light will distort the color of your dishes.
Too cool a light will make your food photos look bluish and unappetizing. Instead, go for a warm light without any color cast.
We all know the same pictures, what if we try something new? Maybe make a drawing to it, let something fly, or put a writing layer over it on the image itself.
There are so many ways for food styling to stand out from the crowd, which is incredibly important as a blogger because you’ve seen one and the same thing a thousand times. Have courage for the gap! Have the courage to try something new!
To save yourself some of the post-processing, it is recommended to set the white balance on your camera in advance. With this technique, your photographs will have consistent color and your feed will appear consistent.
In addition, color shifts can occur if you only adjust the values during image processing, and the food often looks unappetizing.
In addition, we urge that you always utilize a good camera rather than your smartphone. Even if you have a good phone and plenty of daylight, your post-processing options are limited.
The bird’s eye view rarely makes sense for food photos. In some situations, however, it can make sense to get up on a chair and hold the camera on top of it from above.
For example, if you want to show the entire arrangement from above, as in baking. Here you can shoot the work surface from above and drape jars with sugar, flour, and ingredients like chocolate, nuts, or fruit.
Additionally, you can dust the work surface with flour and add nice tea towels and other matching utensils.
In a single shot of a chocolate brownie piece, the brownie looks flat and not very appealing when photographed only from above. The texture is lost, and you can’t see how moist the batter is.
If, on the other hand, you show the brownie from the side and have already taken a bite, your followers will immediately see how the dough looks and how high the brownies will be.
The primary rule for you as a food blogger is to experiment with several angles and viewpoints before taking the final photo.
Of course, a coherent background with matching accessories is important, but the setting should not distract from the food. On the other side, you should avoid using an all-white background because it appears uninteresting. Wooden plates or trays and tables are super suitable.
The wood does not necessarily have to be natural; even white or dark glazed wood surfaces can provide a nice contrast to the food. The rough concrete floor in the courtyard or an old fruit box can be perfect for your project.
Otherwise, it’s worth making a background out of some old boards or asking for old crates at the market.
Variety for your food photos offers different tablecloths as well as dishes and cutlery. Wooden bowls and plants create tropical vibes if you want to photograph your homemade nice ice cream, for example.
For a rustic pumpkin pie, Grandma’s decadent silverware is certainly the way to go. A black slate plate is also a grateful backdrop. Autumnal and winter dishes look especially atmospheric this way.
Tea towels draped all around the plate can create beautiful effects and add a bit of flare to colorless dishes. If you want, you can also place a few loose ingredients next to it instead – it’s best to simply scatter them and leave them as they naturally fall.
Depending on the dish, suitable ingredients include oatmeal, almonds, berries, nuts, herbs, and spices. Halved lemons or fresh flowers in the picture provide an additional freshness kick.
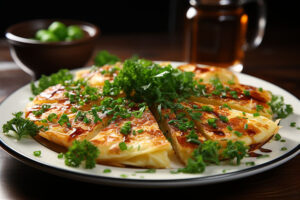
I always try to combine colors so that they match each other and, most importantly, look special! If you have everything in one tone, it looks quite boring.
Let’s say I have everything in red, then I add something green to it. It looks peppier and stands out more.
This will help you right away because you can use natural light to your advantage.
Use a larger aperture like f/8 to get all of the market stalls in focus, or open the aperture to f/2.8 to get a particular subject in focus whilst also blurring the background.
It’s true that most professionals own a lot of expensive camera equipment and have props at their disposal. This helps them get better at taking pictures. But you don’t have to buy the most expensive tools.
The best photos have lovely lighting. There are both lights and darks in the lighting. This makes it easier to see colors, tones, textures, and depth. Make sure you take your pictures when the light is the best it can be.
Your pictures will look better if you can afford one or two backgrounds. The best backgrounds have texture, a few different colors, and a “blue” feel to them.
So like blue and gray or blue and white. Backgrounds with texture add a sense of “luxury” to our food story and make it stronger.
Most people who are new to food photography believe that we need the best camera to get the best pictures. But in reality, a good lens can make more of a difference than the camera itself.
Cameras are always getting better and sensors get better. Over time, the camera’s parts and how it works will change. But most lenses stay the same. If you take care of your lens, you will be able to use it for decades.
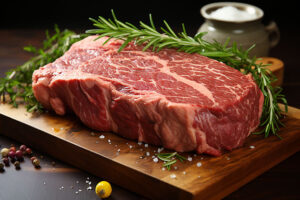
In food photography, color is so important because it’s the main thing that makes us feel connected to the food. We’ve been around food our whole lives, so we know what a strawberry should look like.
So, when you take pictures for your food blog, you want to make sure the colors are as close to the real thing as possible. This will require us to make sure that our pictures are the right color before we publish them on the blog.
For those passionate about food photography, Food presets for Lightroom are the secret sauce to mouth-watering visuals.
You can do this in post-processing, but the simplest way is to make sure your white balance is right. The white balance of your pictures can be changed in the camera. Choose what kind of scene you want to shoot.
Since food photography is usually done inside next to a window, choose between cloudy, shaded, or sunny. Most food bloggers will shoot in the same place, so they will only need to figure out which ones work for them.
If you aren’t sure which one to use, take a few pictures with each one. We are comparing the colors on playback to see which one looks the most like real life.
The changes she made to the food seem to have upset a lot of moms. People are excited to see what she comes up with next. Lee didn’t learn how to be a good designer in school; she taught herself.
More food blogger inspiration:
Black ice cream is the new #foodporn on social media
8 Things They Don’t Tell You When You Start a Food Blog
Keeping It Real: My Messy Food Blogger Kitchen
Bloggers You Should Be Following
The New Vegetarian Cooking for Everyone
8 Irresistible Food Blogs From Sub-Saharan Africa
Related Articles
Food Photography Hashtags and Quotes
Food Photography
Food Photography
Food Photography
Your thoughts and questions
Food photography is a great term for making your restaurant business effective and food photo editing is also important.