13 Essential Tips for Low Light Food Photography
Silvain • updated November 9, 2022 • 5 min read
Silvain • updated November 9, 2022 • 5 min read

It can be really hard to take good photos of food when there isn’t much light, but it doesn’t have to be.
As food photographers, we have to adapt and learn how to keep working even when there is a dark sky and never ending rainfall.
Content
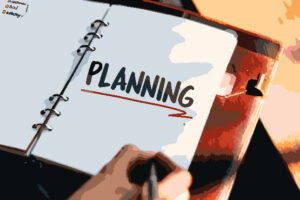
I am a fan of good preparation and planning. Now, when the time with daylight is so short, good preparation is even more important than usual.
Because when the light is there, you want to use the time to photograph, not to cook, set up, wash dishes, set up the camera, buy ingredients, etc.
If you know you want to photograph your food tomorrow, charge all the batteries the night before. The day before, buy everything, set up your kit, and be prepared enough to get started as soon as the light is there. Also have a look at our article food styling explained!
If you’re shooting in an apartment, there are usually brighter and darker rooms. Depending on the time of day, the sun is at a different point in the sky.
This also affects the light in your apartment. Since the sun rises in the east, you’ll have the most light in the morning in the rooms that face east.
At noon, you’ll face south, and in the afternoon, you’ll find the best light in the west. Food photography usually has the advantage of having a relatively small setup.
You can use this and go with your food, including background and decoration, into the room where there is the most light. If you have a balcony or garden, even better. For the best outcome of your photoshoot, read the Food Photography with Natural Light
Especially in low light conditions, the colors in the camera falsify very quickly. Often, pictures taken under gray skies look bluish and cool. To avoid this, you should familiarize yourself with the manual white balance.
I always shoot in RAW format. In contrast to JPG, RAW has the huge advantage that it contains much more image data. This means that the files are larger and take up more space, but it’s worth it.
For example, a RAW image contains more light and dark gradations. This is very helpful if your image is a bit too dark (or underexposed). Since there is more information in the image, you can work it out in post-processing.
With JPG, on the other hand, there is often no data left in these critical areas. While you can still get something out of the RAW image by means of exposure, only a black spot remains with the JPG.
Behind every drool-worthy food photo is a secret: food presets For Lightroom. They work their magic subtly, enhancing shadows, highlights, and hues to make every bite look irresistible.
There is no one camera setting that always works. It is always a combination of exposure time, aperture, and ISO. It always depends on what you want to achieve with your image.
Do you need a photo that is sharp from front to back? Then you have to juggle exposure time and ISO. Or are you more interested in the atmosphere? Then you can open the aperture wider and maybe lower the ISO a bit.
I’m generally not a big fan of high ISO values, but in an emergency, I’d rather have a noisy image than a blurry one.
The longer the focal length, the shorter the shutter speed needs to be to keep your handheld shot from blurring. In low light conditions, however, we usually want the longest possible exposure time.
So it is recommended to use a short focal length (e.g. 50mm) and get closer. With a 50mm, you can still get sharp photos with an exposure time of 1/60s. With a 100mm, you would need at least 1/100s.
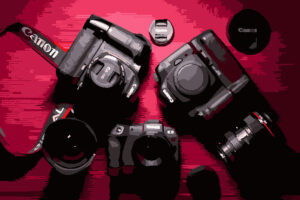
Don’t just look for a lens with a short focal length, but also for its speed. The smaller the number, the better. The smaller the number, the larger the aperture and the more light that enters your camera.
As a rule, fixed focal lengths are faster than zoom lenses. I always like to recommend the Canon 50mm with F 1.8. This is a great lens for food photography and costs under 150 €. Of you own a zoom lens, you can read our article about zoom lens vs fixed focal lens.
In addition to the camera settings, you can also make a difference yourself. You have to understand that even the smallest movements can cause a picture to blur.
Especially in low light conditions, it is difficult to take sharp pictures in the dark. If you shoot handheld, it is important to know how to keep your camera stable. This is quite simple:
In addition to your posture, you can also make sure that your image stabilizer is turned on when taking pictures. Depending on the manufacturer, you will find this in your camera settings or via a switch on your lens.
However, you should be aware that the image stabilizer only serves as a support to compensate for the photographer’s own movement. If there is too much movement, even an image stabilizer is of no use.
My favorite point. I’m already sounding like a skipped record, but I can’t say it often enough. For me, a tripod is part of the basic equipment of every food photographer, next to the camera.
I don’t want to list all the points now why a tripod is important for food photography, I already did that in another post. But especially in low light conditions, when you want to do without artificial light sources, a tripod is the best thing you can do. Food doesn’t usually move.
So you can use a tripod to lower the ISO value and increase the exposure time without risking blur. This is especially useful if you want your image to be sharp from front to back.
As we’ve found, you often need a long exposure time in low-light conditions. Even small vibrations can cause camera shake. Even if your camera is on a tripod, just releasing the shutter can cause your image to become blurry.
To avoid this, it’s worth using a remote shutter release * so you don’t have to touch your camera. If you don’t have a remote shutter release, you can also use the self-timer to take delayed photos.
Then the camera may shake when you press the shutter button, but not when the picture is taken a few seconds later.
In addition to your posture and camera equipment, you can also optimize your setting for low light conditions. For example, use bright backgrounds. These reflect the little available light and automatically brighten up your image.
Similar to bright backgrounds, reflectors help you to increase the little light. They help to brighten up areas of the image that are too dark. To do this, take a reflector and position it opposite your light source.
Then turn the reflector so that it brightens the corner that looks too dark. You can buy cheap 5-in-1 reflectors *, but a simple styrofoam plate will also do.
Use the lowest ISO setting possible when taking pictures as a general rule. Your initial response should be to increase your ISO when shooting in low light.
However, a higher ISO will introduce noise to your images, particularly in the shadows.
More light enters your camera the longer the shutter speed. Although it seems straightforward, increasing your shutter speeds causes more camera shake.
As a general rule, never hold your camera still for less than 1/125th of a second. Your hand’s minute motions are to blame for this.
We suggest using a prime lens, that has a fixed focal length and generally has a larger maximum aperture (f/1.4 to f/2.8), if you have the option of changing your lens for low-light photography.
The lens that comes with a new camera as standard is known as the kit lens. The typical focal length of this zoom lens type is 18–55mm at f/3.5–5.6.
Since they have a limited range of apertures, inexpensive and adaptable kit lenses aren’t the best for low-light photography. Interested in sharp photos? Check our how to get sharp food photos here!
As you can see, there are a lot of tricks you can use to help yourself out. Taking photos in dark lighting conditions isn’t quite as easy, but with these tips, you should be able to take sharp pictures of your food even in the dark season.
And a small consolation: when November is over, the worst is over. From December on, the days will get longer again.
More about food
Lens artist challenge, low light
Practicing Handheld Low Light Photography
Tips for shooting low light food photography
Slow cooked BBQ ribs
50 Light and Healthy Soup Recipes
16 Healthy Recipes
What’s the Best Solar Cooker?
Related Articles

Food Photography
Food Photography
Food Photography

Food Photography
Your thoughts and questions