8 Real Estate Photography Types You Should Know
Michael • January 20, 2023 • 4 min read
Michael • January 20, 2023 • 4 min read

There are several key types of photography you should consider to showcase your properties in the best possible light. So, buckle up, because I’m about to take you on a journey through the world of Real Estate Photography Types that will elevate your listings to new heights!
Ladies and Gentlemen, are you ready to up your real estate photography game? If you’re looking to make a lasting impression on potential buyers, then you’ve come to the right place. With the rise of digital marketing, real estate photography has never been more
In this article, we will delve into the different types of real estate photography, as well as the unique considerations for each type.
Content
My friends, let me ask you this – have you ever walked into a property and been immediately struck by the ambiance and charm of the space? That, my friends, is the power of real estate photography.
Real estate photography is the art of capturing a property in its best possible light, showcasing not just the features and details of the space, but also its character and atmosphere.
It’s about creating an emotional connection with potential buyers, painting a picture of what their life could look like if they were to call this property their own.
Whether it’s a sprawling mansion or a cozy studio apartment, real estate photography brings the property to life and showcases its full potential. So, let’s raise a glass to the magic of real estate photography and the impact it can have on a sale!
Incorporating high-quality photography into your real estate listings is a game-changer. Not only does it allow potential buyers to get a true feel for the property from the comfort of their own home, but it also sets your listings apart from the competition.
By showcasing your properties in the best possible light, you can attract more potential buyers, increase interest, and ultimately drive up the sale price.
And let’s not forget, well-executed real estate photography can save you time and effort by reducing the number of in-person viewings you need to conduct.
Get more tips about how to prepare a home for a photoshoot.
In short, the benefits of real estate photography are saving time, and potentially increase your sale price, investing in real estate photography is a no-brainer!
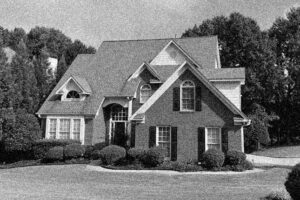
Residential photography is a type of photography that focuses on showing how beautiful and useful homes are. It is commonly used in the real estate industry to market properties for sale or rent, and can also be used by homeowners to document the design of their homes.

Residential photographers take photographs of the interior and exterior of a home to highlight its key features, such as the living room, kitchen, and bedrooms. The goal of residential photography is to make pictures that look good and are true to the home. These pictures can be used for marketing or for your own records.
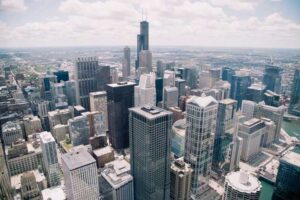
Commercial property photography focuses on showing off the best parts of commercial spaces like office buildings, warehouses, and stores and it is often used to market properties for sale or rent.

Commercial property photographers take pictures of the inside and outside of a commercial property to show off its best parts, like its size, layout, and condition.
This kind of photography takes pictures of the property that are accurate and appealing. These pictures can be used for marketing or as proof of ownership. Additionally, it can be used for architectural photography, to show the design and layout of the building.
Learn also about which captions and real estate quotes to use at social media use when offering your home.
Architectural photography captures how buildings and structures look and how they are made. It is used to record and show off the architectural features and details of both old and new buildings.

Architectural photographers take photographs of the exterior and interior of buildings, from different angles and perspectives, to create an overall sense of the building’s design and layout, and also to provide visually stunning and accurate representations of a building that can be used for documentation, marketing, or artistic purposes.
The exterior of a property is the first thing potential buyers will see, and it’s crucial to make a good first impression. That’s why exterior photography is so important. It’s about showcasing the property’s best features, highlighting its curb appeal, and making it feel like a place of potential and possibility.

Interior photography is just as important as exterior photography, if not more so. After all, potential buyers will spend the majority of their time inside a home. It’s about showcasing the warmth and character of a space, making it feel like a place where people can envision themselves living.

Aerial photography is another important aspect of real estate photography, as it allows potential buyers to see the property from a different perspective. It’s a great way to show off big homes or homes with unique features, like a pool or a big backyard.

Video tours are another important aspect of real estate photography, as they allow potential buyers to see the property in motion. They’re especially useful for showing off properties that are hard to capture with still photos, like those with unique features or that are in hard-to-reach places.

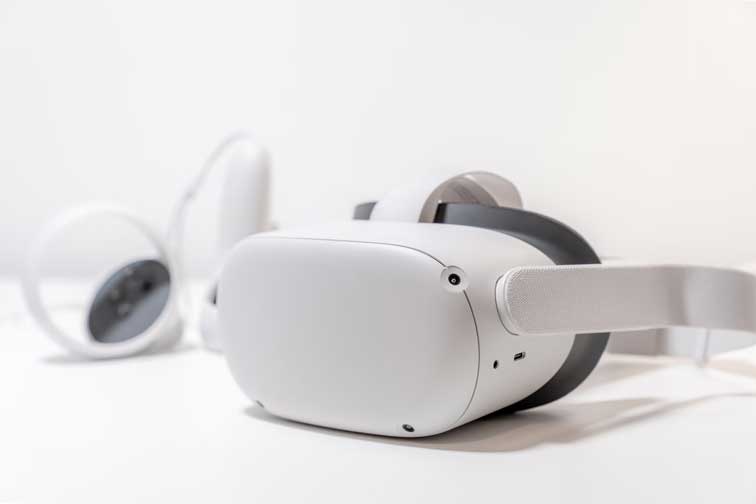
Virtual tours are another important aspect of real estate photography, as they allow potential buyers to see the property without having to physically be there.
They’re especially helpful for showing off properties that might be hard to see in person, like those in hard-to-reach places or ones that are being lived in right now.
In the digital age, where first impressions often come from online listings, real estate Lightroom presets are invaluable. They enhance the ambiance and mood of spaces, making them more enticing to prospective clients scrolling through online platforms.
Real estate photography is an art form that requires skill, technique, and a good eye for composition and lighting. Whether it’s showcasing a family home, a commercial space, or an architectural design, the right photography can make all the difference in attracting potential buyers.
From exterior to interior, aerial to video tours, and virtual tours, it’s essential to use the right tools and techniques to make a property look it’s absolute best.
High-quality real estate photography is an investment that can pay off in a big way, and it’s more important than ever in today’s competitive real estate market.
So, if you want to make your property stand out, make sure to invest in professional real estate photography.
Related Articles
Your thoughts and questions