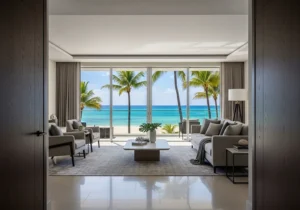
Blue Tone Presets Guide for Lightroom & Free Blue Preset
Michael • June 19, 2025 • 8 min read
Learning how to use blue tone presets effectively can instantly transform your ordinary photos into cinematic masterpieces that grab attention and tell compelling stories. This guide will teach you everything about blue preset editing, from basic application to advanced customization techniques that professional photographers use.
Content
1. Understanding Blue Tone Presets: What They Are and How They Work
Blue tone presets are pre-configured color adjustments that shift your image’s color palette toward cooler, more dramatic tones. Understanding how these editing tools work is the first step to mastering blue color grading in Lightroom.
Blue preset editing works best for:
Portrait photography with dramatic lighting
Urban and street photography
Night scenes and low-light situations
Fashion and commercial photography
Landscape photography with overcast skies
The beauty of blue preset editing is their ability to create mood instantly. While warm tones feel inviting and cheerful, cool blue tones create mystery, sophistication, and emotional depth.
2. How Blue Tone Presets Transform Your Images
When you apply a blue tone preset, several things happen the same time:
Color Temperature Adjustment: The preset reduces warmth by pushing the temperature slider toward the cooler side, typically between 3200K-4500K.
Selective Color Grading: Blue presets target specific color ranges, boosting blues and cyans while suppressing oranges and yellows.
Shadow and Highlight Control: Most quality blue presets add subtle blue tints to shadows while maintaining neutral or slightly warm highlights.
Contrast and Clarity: These presets often increase contrast and add negative clarity for that soft, cinematic feel.
Different blue preset styles create unique moods – from subtle vintage tones to bold cinematic effects
3. Types of Blue Tone Presets You Should Know
Moody Blue Presets
Perfect for portraits and intimate scenes, these presets create deep, emotional atmospheres with rich shadows and subtle blue highlights.
Cinematic Blue Presets
Inspired by Hollywood color grading, these presets mimic the look of major motion pictures with strong blue-orange contrast.
Vintage Blue Presets
Combining blue tones with faded film aesthetics, these presets create nostalgic, timeless looks.
Electric Blue Presets
Bold and vibrant, these presets create striking, modern looks perfect for fashion and commercial work.
4. Take your Blue Tone Editing to the Next Level
Get professional blue tone presets that have been crafted by experts and tested across different lighting conditions. These ready-made presets can save you hours of manual editing while delivering consistent, professional results that will make your photography stand out.
8. Advanced Techniques: Fine-Tuning Your Blue Preset Edits
Raw presets rarely work perfectly straight out of the box. Here’s how to customize them:
Temperature and Tint: Adjust these first to match your lighting conditions. Tungsten lighting needs more cooling, while daylight might need less.
Exposure and Highlights: Blue presets can sometimes make images too dark. Boost exposure slightly and pull down highlights if needed.
Shadows and Blacks: Lift shadows to reveal detail, but keep some blacks for contrast.
Vibrance vs Saturation: Use vibrance to boost colors without oversaturating skin tones.
Protect skin tones when applying blue presets – use masking tools to maintain natural, healthy-looking skin
9. Common Blue Preset Editing Mistakes to Avoid
Over-processing: Blue presets can look artificial if pushed too far. Start with lower intensity and build up.
Ignoring Skin Tones: Blue presets can make skin look unhealthy. Use masking tools to protect skin areas.
Wrong White Balance: Always correct white balance before applying presets for best results.
One-Size-Fits-All Approach: Different lighting conditions require different blue preset intensities and adjustments.
10. Professional Blue Tone Editing Tips for Better Results
Shoot in RAW: You need maximum color information for best preset results.
Consider Your Light Source: Artificial lights interact differently with blue presets than natural light.
Use Local Adjustments: Apply blue presets globally, then use masking to fine-tune specific areas.
Layer Multiple Presets: Sometimes combining a subtle blue preset with a contrast preset creates better results than one strong preset.
Check Your Monitor: Color accuracy matters. Use a calibrated monitor for consistent blue tone editing results.
“When I first started testing blue tone presets, I ran into a weird problem—my shadows were turning neon blue. Turns out, it wasn’t the preset—it was my Camera Calibration settings in Lightroom Classic. A quick tweak to the Blue Primary slider fixed everything. It’s a small detail, but one that really affects how your tones show up.”
11. Best Practices for Different Photography Styles
Apply blue presets subtly to portraits, focusing the effect on backgrounds while preserving natural skin tones
Portrait Photography
Keep blue tones subtle in skin areas
Use graduated masks to apply stronger effects to backgrounds
Watch for color casts in white clothing or accessories
Blue presets work beautifully with overcast skies and mountain landscapes, adding drama and mood
Landscape Photography
Blue presets work well with overcast skies
Be careful with green vegetation, which can turn muddy
Use luminosity masks to protect bright areas
Street Photography
Blue presets complement urban environments
Work well with artificial lighting
Help create consistent mood across series
12. DIY Tutorial: Creating Your Own Blue Tone Preset
Want to create custom blue presets? Here’s a basic tutorial for building your own blue tone editing preset:
Temperature: Move to around 4000K
Tint: Slight magenta shift (+5 to +10)
Highlights: Pull down to -20 to -40
Shadows: Lift to +20 to +30
Blues: Increase saturation by +15 to +25
Oranges: Decrease saturation by -10 to -20
Save these settings as a new blue tone preset and adjust from there based on your specific style preferences.
Fix common blue preset problems by adjusting exposure and protecting skin tones – compare the dramatic improvement
13. Troubleshooting Blue Preset Editing Issues
Colors Look Unnatural: Reduce preset intensity and adjust individual color channels.
Skin Tones Look Sick: Use luminosity masks to protect skin areas or adjust the orange/yellow channels.
Image Too Dark: Increase exposure and lift shadows before applying the preset.
Preset Doesn’t Match: Different cameras and lighting conditions affect how blue presets work. Always fine-tune based on your specific image.
14. Blue Tone Presets are here to Stay
Blue tone editing aesthetics aren’t going anywhere. Social media loves moody, high-contrast images, and blue presets deliver just that. With smartphone cameras getting better, more photographers are using them to make their shots stand out.
Key Points:
Blue presets create mood but need careful adjustment for skin tones and lighting
Treat them as starting points, not final edits – customize for each image
Quality presets save time and deliver pro results
Experiment to develop your signature blue-toned style
Pro Tip: Invest in expert-made presets for consistent, standout edits.
What are your thoughts about this Blue Tone Presets Guide? Let us know in the comments.
By Furoore team member Michael Furoore Team is here to assist you in capturing the most significant moments in your life. To create exciting photographs, discover photography guides, find unique photo ideas, and limitless image inspiration.