Master Hotel Photography: Essential Photo Tips and Tricks
Michael • May 4, 2023 • 10 min read
Ah, hotel photography, the unsung hero of the hospitality industry. A picture might be worth a thousand words, but in the case of hotels, it’s worth a thousand bookings (or lost bookings if done poorly).
Capturing the essence of a hotel in a single frame is no easy feat, but with the right skills and a dash of ingenuity, you can create images that will leave potential guests swooning. In this article, we’ll dive into the best practices for hotel photography, offering tips and tricks that’ll have you snapping like a seasoned pro in no time.
So, buckle up and grab your camera, because we’re about to embark on a journey into the world of hospitality imagery.
Content
1. Equipment and Camera Settings
A. Choosing the Right Camera
Selecting the ideal camera for hotel photography is like trying to pick the perfect wine for a dinner party – it’s a delicate balance between quality and budget. While it’s true that most modern cameras can capture impressive images, a professional-grade DSLR or mirrorless camera will give you the flexibility and control needed to achieve the best results.
When choosing your camera, consider factors such as sensor size, megapixels, and low-light performance. Full-frame cameras offer better low-light capabilities and a wider dynamic range, while crop sensor cameras are generally more affordable and lightweight.
Ideally, aim for a camera with at least 20 megapixels to ensure high-resolution images suitable for large prints and digital marketing materials.
B. Lens Selection for Optimal Results
Lenses play a crucial role in shaping the visual story of a hotel. For hotel photography, two types of lenses are particularly important:
Wide-angle lenses: These lenses are indispensable for capturing small or confined spaces like guest rooms, bathrooms, and tight corridors. A lens with a focal length between 16mm and 24mm is ideal for most situations. However, be cautious of distortion, especially when using ultra-wide lenses, as they can create an unnatural perspective.
Standard or mid-range zoom lenses: A versatile zoom lens, such as a 24-70mm or 24-105mm, is perfect for capturing a variety of shots, from detail-oriented close-ups to wider scenes like lobbies and dining areas. These lenses offer flexibility and adaptability, allowing you to switch between different focal lengths without needing to swap out lenses.
C. Tripods and Stabilization
A tripod is an essential piece of equipment for hotel photography, ensuring sharp images and providing a stable base for your camera. This is particularly important when shooting in low-light conditions or using slower shutter speeds, as camera shake can lead to blurry images.
When choosing a tripod, consider factors such as weight, stability, and ease of use. Carbon fiber tripods are lightweight and sturdy, making them an excellent choice for photographers on the go. Additionally, a tripod with a ball head offers smooth and precise adjustments, allowing you to compose your shots with ease.
D. Camera Settings for Optimal Exposure and Depth of Field
To capture stunning hotel images, you’ll need to master the exposure triangle: aperture, shutter speed, and ISO.
Aperture: A wide aperture (low f-number) creates a shallow depth of field, which can be used to highlight specific details or features. Conversely, a narrow aperture (high f-number) keeps the entire scene in focus, which is ideal for showcasing spacious rooms or expansive lobbies. Experiment with different aperture settings to achieve the desired depth of field for each shot.
Shutter speed: Adjust your shutter speed according to the lighting conditions and your desired effect. Slower shutter speeds can be used to capture ambient light and create a sense of motion, while faster shutter speeds freeze action, ensuring sharp images.
ISO: Keep the ISO as low as possible to minimize image noise and maintain optimal image quality. In low-light situations, you may need to increase the ISO, but always strive to strike a balance between a well-exposed image and acceptable noise levels.
Don’t forget to shoot in RAW format, as this provides greater flexibility during post-processing, allowing you to recover highlights, shadows, and adjust white balance with minimal image degradation. For more Ideas, you can find additional resources at Hotel Photography Ideas .
2. Lighting Techniques
A. Natural Light versus Artificial Light
Lighting plays a pivotal role in hotel photography, setting the mood and bringing spaces to life. When it comes to lighting, you have two primary options: natural and artificial light.
Natural light: Harnessing sunlight can produce stunning, authentic images that showcase the hotel in its most organic state. The golden hour – just after sunrise and before sunset – is the perfect time to capture warm, soft light that bathes the scene in a gentle glow. However, natural light can be unpredictable and may require patience as you wait for the ideal conditions.
Artificial light: Sometimes, natural light just doesn’t cut it. In these cases, artificial lighting, such as external flash units or continuous LED lights, can help fill in shadows, enhance color balance, and create a consistent, controlled environment. While artificial light offers more control, it’s essential to use it judiciously, avoiding harsh, unflattering results.
B. Using Reflectors and Diffusers
Reflectors and diffusers are indispensable tools in hotel photography, helping you manipulate light to create the desired effect.
Reflectors: These handy accessories bounce light onto your subject, filling in shadows and adding depth to the scene. Reflectors come in various sizes, colors, and materials, each with its own unique properties. Gold and silver reflectors produce warmer and cooler tones, respectively, while white reflectors provide a more neutral effect.
Diffusers: Diffusers scatter light, creating a soft, even glow that eliminates harsh shadows and reduces contrast. When working with natural light, a diffuser can be placed in front of a window to soften the sunlight. Alternatively, diffusers can be attached to artificial light sources, such as flash units, to mimic the gentle illumination of natural light.
C. Balancing Interior and Exterior Light
One of the challenges in hotel photography is balancing interior and exterior light, particularly when capturing spaces with large windows or glass walls. Unbalanced lighting can result in overexposed exteriors or underexposed interiors, detracting from the overall image quality.
To address this issue, consider the following techniques:
Shoot during the golden hour or blue hour, when the outdoor light is softer and more closely matches the intensity of interior lighting.
Use artificial light sources to illuminate the interior, bringing it closer to the brightness of the exterior.
Employ High Dynamic Range (HDR) photography, which involves taking multiple exposures and combining them in post-processing to create a balanced final image.
D. Creating Ambiance with Creative Lighting
The use of creative lighting techniques can add depth, drama, and ambiance to your hotel images, transforming ordinary spaces into captivating, visually striking scenes.
Accent lighting: Use small, focused light sources to highlight specific features, such as artwork, architectural details, or unique amenities. This draws the viewer’s attention to these elements and adds visual interest.
Color gels: Placing colored gels over your artificial light sources can introduce a subtle hue to your images, evoking a specific mood or atmosphere. For example, a warm orange or red gel can create a cozy, inviting ambiance, while a cool blue or green gel can evoke a sense of calm and tranquility.
Light painting: This long-exposure technique involves “painting” light onto a scene using a handheld light source, such as a flashlight or LED wand. Light painting allows you to create dynamic, dramatic effects that highlight specific areas or add an artistic flair to your images.
3. Composition and Framing
A. Rule of Thirds and Leading Lines
Mastering composition and framing is essential to creating visually engaging hotel photographs. The rule of thirds and leading lines are two fundamental techniques that can elevate your images.
Rule of thirds: This compositional guideline involves dividing the frame into a 3×3 grid, placing key elements along the lines or at their intersections. This technique creates balance, harmony, and visual interest, guiding the viewer’s eye through the image.
Leading lines: Leading lines are natural or architectural lines that guide the viewer’s gaze toward a focal point or through the frame. Hallways, staircases, and patterns in flooring or walls can serve as leading lines, drawing attention to specific elements or creating a sense of depth and movement.
B. Capturing Unique Angles and Perspectives
Experimenting with angles and perspectives can result in unexpected, intriguing compositions that set your hotel photography apart from the competition.
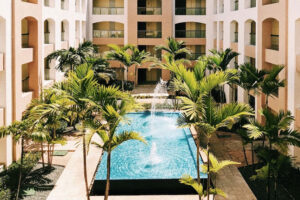
High-angle shots: Positioning your camera above the subject can provide an overview of the space, showcasing its layout and design. This perspective is particularly effective for capturing large areas, such as lobbies, pools, or courtyards.
Low-angle shots: Shooting from a lower vantage point can create a sense of grandeur and drama, emphasizing height and making spaces appear larger. This perspective is ideal for capturing tall, imposing structures or highlighting interesting ceiling details.
Eye-level shots: While not as unconventional as high or low angles, eye-level shots can provide a relatable, human perspective that invites viewers to imagine themselves in the space.
C. Emphasizing Space and Depth
Creating a sense of space and depth in your hotel photographs is crucial for conveying the true essence of the environment. Use the following techniques to add dimension and visual interest to your images:
Layering: Compose your shots with elements in the foreground, middle ground, and background, creating layers that draw the viewer’s eye through the image and add depth.
Wide-angle lenses: As mentioned earlier, wide-angle lenses can capture more of the scene, making spaces appear larger and more expansive.
Framing within a frame: Utilize natural or architectural frames, such as doorways or windows, to create a sense of depth and dimension in your photographs.
D. Including Key Features and Amenities
A hotel’s unique features and amenities are what set it apart from the competition, and it’s essential to highlight these in your photographs.
Focus on the unique: Identify the hotel’s standout features, such as a rooftop pool, a luxurious spa, or an exquisite on-site restaurant, and make sure to capture them in your images.
Details matter:Pay attention to the small details that contribute to the overall atmosphere and guest experience. This may include beautifully plated dishes, intricate décor, or plush linens.
Capture the essence: Go beyond the tangible and try to capture the intangible qualities that make the hotel special, such as its ambiance, history, or the warmth of its staff. This might involve photographing an engaging interaction between employees or capturing the soft glow of candlelight during a romantic dinner.
4. Staging and Preparation
A. Decluttering and Cleaning the Space
Before you start snapping away, it’s essential to declutter and clean the space you’ll be photographing. This not only ensures a polished and professional appearance but also allows potential guests to focus on the hotel’s unique features and amenities.
Remove personal items: Ensure that there are no personal belongings or unnecessary objects in the frame, such as luggage, cleaning equipment, or staff members’ possessions.
Clean surfaces: Wipe down tables, countertops, mirrors, and windows to eliminate dust, smudges, and fingerprints.
Neat and tidy: Arrange books, magazines, and decorative items in an orderly fashion, ensuring that they don’t appear cluttered or haphazard.
B. Adding Props for a Welcoming Atmosphere
Props can be used to create a welcoming, inviting atmosphere that entices potential guests and helps them envision themselves in the space.
Fresh flowers: A vase of fresh flowers can add a splash of color and life to any room, creating a sense of warmth and hospitality.
Food and beverages: Thoughtfully arranged food and drink items, such as a tray of pastries or a bottle of wine with glasses, can suggest indulgence and relaxation.
Personal touches: Incorporate subtle, tasteful props that reflect the hotel’s personality, such as a cozy throw blanket on a couch, a stack of artfully arranged coffee table books, or a collection of stylish toiletries in the bathroom.
C. Adjusting Furniture and Linens for the Best Presentation
The arrangement and appearance of furniture and linens can significantly impact the overall look of your hotel photographs.
Furniture placement: Arrange furniture to showcase the room’s layout and maximize the sense of space. Ensure that chairs, tables, and sofas are evenly spaced and aligned, creating a visually pleasing and harmonious composition.
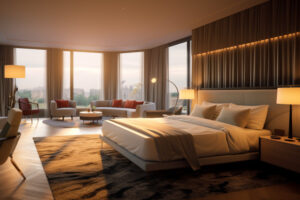
Bed linens: Smooth out any wrinkles or creases in the bed linens and fluff the pillows for a crisp, inviting appearance.
Towels and robes: Neatly fold and hang towels, and arrange bathrobes in an appealing manner, emphasizing the hotel’s attention to detail and commitment to guest comfort.
D. Collaboration with Hotel Staff and Management
Working closely with hotel staff and management is crucial for a successful hotel photography shoot. Their knowledge and expertise can be invaluable in ensuring that your images accurately represent the property and its unique qualities.
Communication: Maintain open lines of communication with the hotel staff, discussing your plans, vision, and any specific requirements or restrictions. This will help to avoid misunderstandings and ensure a smooth, efficient shoot.
Assistance: Enlist the help of staff members in staging and preparing the spaces, as they will likely have a keen eye for detail and a deep understanding of the hotel’s aesthetic.
Feedback: Share your images with the hotel management and staff, seeking their feedback and incorporating their suggestions to create the most authentic and captivating representation of the property.
5. Post-Processing Techniques
A. Basic Adjustments for Exposure, Contrast, and White Balance
Post-processing is an essential step in refining and perfecting your hotel photographs. Begin with basic adjustments to ensure a solid foundation for further enhancements.
Exposure: Adjust the exposure to achieve the desired brightness, ensuring that your image is well-balanced and properly exposed without losing detail in the highlights or shadows.
Contrast: Modify the contrast to enhance the difference between the light and dark areas of your image, creating depth and visual interest.
White balance: Correct the white balance to ensure accurate color representation, eliminating any unwanted color casts caused by different light sources.
B. Perspective Correction and Lens Distortion Removal
Correcting perspective and lens distortion is crucial for achieving professional-looking hotel images.
Perspective correction: Use post-processing tools to correct any converging vertical lines or skewed angles, ensuring that your images appear natural and visually appealing. This is particularly important for architectural shots, where straight lines and accurate proportions are key.
Lens distortion removal: Wide-angle lenses can sometimes cause distortion, making objects near the edges of the frame appear stretched or curved. Use post-processing software to correct this distortion and maintain the integrity of your images.
C. Retouching and Object Removal
Retouching your images allows you to remove any imperfections or distracting elements, ensuring a polished final product.
Spot removal: Eliminate any small blemishes, dust spots, or imperfections using a spot removal tool or clone stamp in your post-processing software.
Object removal: Remove any unwanted or distracting objects, such as electrical outlets, cables, or signage, using content-aware fill or clone stamp tools. Be cautious not to overdo it, as excessive editing can make the image appear unnatural.
D. Color Grading and Stylization
Color grading and stylization can help you create a consistent visual style and evoke a specific mood or atmosphere.
Color adjustments: Modify the hue, saturation, and luminance of individual colors to achieve the desired effect. For example, you might boost the saturation of blues and greens in an image of a pool area, creating a sense of freshness and vitality.
Stylization: Apply color grading presets, filters, or custom adjustments to your images to create a cohesive visual style that reflects the hotel’s unique aesthetic. This might involve adding a warm, vintage tone to a boutique property or using cool, minimalistic tones for a sleek, modern hotel. Experiment with different styles, but remember to maintain a balance between creativity and realism.
6. Final Tips and Tricks
A. Building a Portfolio and Showcasing Your Work
Creating a compelling portfolio is crucial for showcasing your skills and attracting potential clients in the competitive field of hotel photography.
Select your best work: Choose a variety of high-quality images that demonstrate your technical prowess, creativity, and versatility.
Organize your portfolio: Arrange your images in a logical, visually appealing manner, grouping them by theme or project to create a coherent narrative.
Update regularly: Continually refresh your portfolio with new work, ensuring that it stays current and reflects your latest skills and accomplishments.
B. Developing a Consistent Style
Developing a consistent style is essential for establishing a recognizable brand and setting yourself apart in the hotel photography market.
Identify your unique perspective: Reflect on your artistic vision, strengths, and preferences to determine your signature style.
Experiment and refine: Experiment with different techniques, compositions, and post-processing styles, refining your approach over time to create a consistent aesthetic.
Stay true to your vision: While it’s essential to adapt to client needs and industry trends, always maintain the integrity of your unique style.
C. Continuous Learning and Staying Updated on Industry Trends
The world of hotel photography is ever-evolving, and it’s vital to stay informed and continually develop your skills.
Attend workshops and conferences: Participate in industry events, workshops, and conferences to network, learn from experts, and stay updated on the latest techniques and trends.
Follow industry publications and blogs: Subscribe to photography magazines, websites, and blogs for inspiration, tips, and insights.
Practice, practice, practice: The more you shoot, the more you’ll learn and grow as a photographer. Challenge yourself with personal projects and continually push the boundaries of your creative and technical abilities.
D. Establishing a Strong Online Presence
A strong online presence is critical for connecting with potential clients and showcasing your work to a wider audience.
Create a professional website: Build a user-friendly, visually appealing website that showcases your portfolio, provides information about your services, and includes contact details.
Leverage social media: Share your work on social media platforms, such as Instagram, Facebook, and LinkedIn, to reach new audiences and engage with existing followers.
Network online: Join photography forums, groups, and online communities to network with fellow professionals and potential clients.
7. Hotels with Best Practices for Hotel Photography
Discover stunning hotels from around the world that have masterfully applied best practices for hotel photography to showcase their unique charm, luxurious amenities, and breathtaking locations:
Belmond Hotel Caruso, Ravello, Italy: This exquisite hotel uses exceptional photography to capture its cliffside location, stunning views, and luxurious amenities.
The Silo Hotel, Cape Town, South Africa: The Silo Hotel’s photography emphasizes its unique architecture, elegant interiors, and breathtaking views of Cape Town’s waterfront and Table Mountain.
Amangiri, Canyon Point, Utah, USA: This luxury desert retreat showcases its minimalist architecture, dramatic landscapes, and serene atmosphere through expertly executed hotel photography.
The Siam, Bangkok, Thailand: The Siam uses professional photography to showcase its beautiful riverside location, stylish Art Deco interiors, and lush tropical gardens.
The Gritti Palace, Venice, Italy: This historic Venetian palace hotel employs exceptional photography techniques to capture its luxurious interiors, unique artwork, and captivating canal views.
The Plaza Hotel, New York City, USA: This iconic hotel showcases its luxurious interiors, grand architecture, and unique design elements through expertly executed hotel photography.
8. Conclusion
In this article, we’ve covered best practices for hotel photography, including equipment and camera settings, lighting techniques, composition and framing, staging and preparation, post-processing techniques, and final tips and tricks.
Remember that success in hotel photography is built on a foundation of hard work, continuous learning, and dedication to your craft. Embrace challenges, stay curious, and continually refine your skills and style to create stunning, evocative images that captivate your audience and showcase the unique essence of each hotel you photograph.
How do you master Hotel Photography? Let us know in the comments.
By Furoore team member Michael Furoore Team is here to assist you in capturing the most significant moments in your life. To create exciting photographs, discover photography guides, find unique photo ideas, and limitless image inspiration.