What is the Best Time of the Day for Portrait Photography?
Daniel • January 28, 2023 • 5 min read
Daniel • January 28, 2023 • 5 min read

When it comes to capturing the perfect portrait, timing is everything. And as any seasoned photographer will tell you, the time of day can make all the difference.
Whether you’re working with natural or artificial light, understanding the nuances of light at different times of the day is crucial to creating stunning, evocative images.
So, if you’re ready to elevate your portrait game and take your photography to the next level, read on as we explore the ins and outs of the best time of day for portrait photography, in the words of a seasoned veteran of the art.
Content
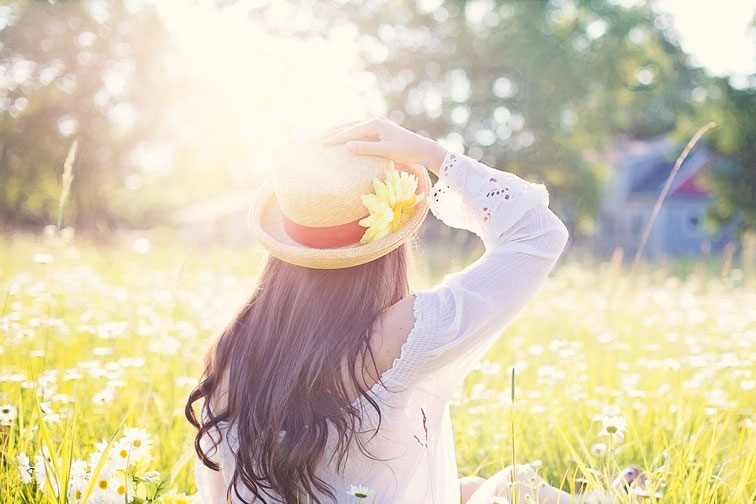
Early morning light, also known as “golden hour,” is a popular time for photographers to capture stunning images. This is the period of time just after sunrise when the sun is low on the horizon and the light is soft and warm.
One of the main benefits of early morning light is the soft, diffused quality of the light. The low angle of the sun means that it travels through more atmosphere before reaching the earth, which scatters the light and creates a softer, more even illumination.

This can be especially flattering for portrait photography because it can reduce harsh shadows and bring out the natural beauty of the subject’s features.
In addition to the soft light, early morning light often has a warm, golden color temperature. This can add a warm, cozy atmosphere to photos and make them feel inviting and welcoming.
However, it’s important to note that early morning light can be brief and unpredictable, as it is dependent on the time of year and location. In some parts of the world, a “golden hour” may last only a few minutes, whereas, in others, it may last several hours.
It’s a good idea to plan your photoshoot in advance and arrive at the location early to make the most of the early morning light.
Early morning is a beautiful time for photography because the light is soft and diffused and has a warm, golden color temperature. It’s a great choice for portrait photography and can add a soft, natural quality to any type of photo.
Midday light, also known as “solar noon,” refers to the period of time when the sun is directly overhead. This usually happens around noon and can last a few hours, depending on where you are and what time of year it is.
Midday light is known for its bright, even illumination, which can be great for outdoor portrait photography. It can give off enough light for photos to be properly exposed and can make shadows that are clear.
However, one of the main drawbacks of midday light is the harsh shadows it can create. The strong, direct sunlight can cast deep shadows on the face and body, which can be unflattering for portrait photography. To soften the shadows, photographers may need to use fill flash or reflectors to balance the lighting.
Midday light can also be harsh on the eyes, making it less comfortable for the subject to be photographed. It’s important to consider the comfort of the subject and to use shade or diffusers to soften the light if necessary.
Midday light is a good choice for outdoor photography, but it can be challenging for portrait photography due to the harsh shadows it creates. Photographers can use fill flash or reflectors to soften shadows and make the light more even and flattering. Read our article about men posing and ideas here.
Visitors also read:
History of photography timeline
35mm portrait
Portrait Photography Quotes
Best Hairstyles to Look Good in Photos
Camera settings for outdoor portraits
Definition of Portrait Photography
Sunset light, also known as “golden hour,” is a popular time for photographers to capture beautiful images. This is the period of time just before sunset when the sun is low on the horizon and the light is warm and golden.
One of the main benefits of sunset light is its warm, golden color temperature. The low angle of the sun means that it travels through more atmosphere before reaching the Earth, which scatters the light and creates a warm, orange-yellow hue. This can add a romantic, intimate atmosphere to photos and make them feel cozy and inviting.

In addition to being warm, the light at sunset is often soft and spread out, which can look good in portraits. It can get rid of harsh shadows and make the subject’s features look their best.
However, it’s important to note that sunset light can be brief and unpredictable, as it is dependent on the time of year and location. In some parts of the world, a golden hour may last only a few minutes, whereas, in others, it may last several hours. It’s a good idea to plan your photoshoot in advance and arrive at the location early to make the most of the sunset light.
The warm, golden light of a sunset is beautiful and sought after for photography because it is soft and spread out. It’s a great choice for portrait photography and can add a romantic, intimate atmosphere to any type of photo.
Nighttime light can give photographers a unique and creative chance to take beautiful pictures. From cityscapes and street scenes to creating portraits, nighttime light can create a moody and atmospheric quality in photos.
One of the main benefits of nighttime light is its ability to create a sense of mystery and drama in photos.
Low light levels and artificial light sources can create shadows and highlights that add depth and interest to the image. This can be especially effective for creative, artistic shots.
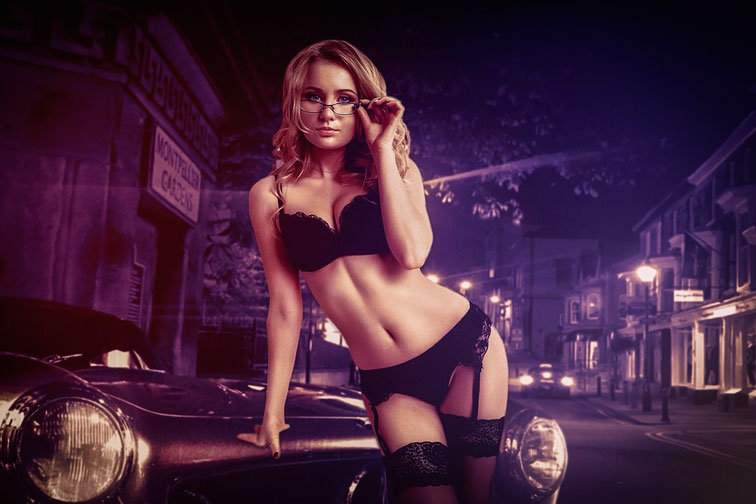
Aside from the creative possibilities, nighttime light can also give photos a sense of quiet and peace. The quiet stillness of the night can create a sense of calm and tranquility in the image.
However, it’s important to note that shooting at night can be challenging due to the low light levels. Photographers may need to use flash or long exposures to properly expose the image. This can require a steady hand or a tripod to avoid camera shake and blur.
Lighting at night can be a creative and unique way for photographers to take beautiful pictures. Low light levels and artificial light sources can give your portraits a moody and atmospheric feel.
Early morning and sunset light, also known as “golden hour,” are considered the best light for portrait photography. The soft, diffused light with a warm, golden color temperature can be very flattering for portrait subjects and can bring out their natural beauty. if you lile to learn more about light, read good portraits with common light sources.
Also, the lower levels of light during the “golden hour” can make flaws in the skin look less noticeable and give a more natural look.It’s important to note that the golden hour can be brief and unpredictable, depending on the time of year and location.
In some parts of the world, the golden hour may last only a few minutes, whereas, in others, it may last several hours. It’s a good idea to plan your photoshoot in advance and arrive at the location early to make the most of the early morning or sunset light. When you are new to portraiture, read our guide about how to start with portrait photography.
When it comes to portrait photography, the best time of day will depend on the desired lighting and the location of the photoshoot. Each time of day has its own unique qualities that can be used to create different types of images.
For soft, diffused light with a warm, golden color temperature, early morning and sunset (also known as “the golden hour”) are popular choices. When taking portraits, these times of day can be especially flattering because they reduce harsh shadows and bring out the natural beauty of the person being photographed.
Midday light can be great for outdoor shots due to its bright, even illumination. However, the strong sun can create harsh shadows, so fill flash or reflectors may be needed to soften the shadows.
Evening and afternoon light can give photos a warm, golden look, but the lower light levels may mean you need to use a flash or a higher ISO to get the right exposure.
The light at night can create interesting, moody lighting for creative, artistic shots, but the low light levels may require the use of a flash or a long exposure.
In the end, the best time of day for portrait photography depends on the lighting you want and where you are taking the pictures.
Experimenting with different times of day and lighting techniques can help you find the best results for your portrait sessions.
Related Articles
Your thoughts and questions