


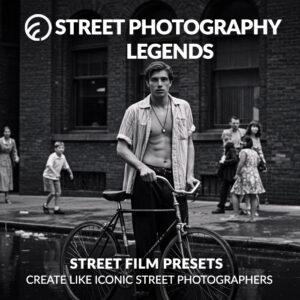
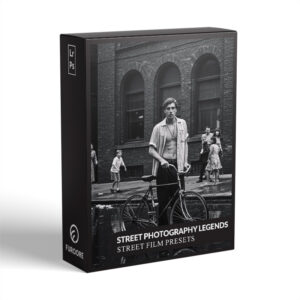
Street Photography Presets Lightroom
$49.90
Elevate your Street Photography Instantly
Urban drama at your fingertips! Our Street Photography Presets unleash the gritty allure of street photography with just one click. 16 custom styles instantly add mood, vibes, bold colors and B&W that make your shots pop. Save hours of editing and get pro street style now. Feel the vibrant pulse of the city!
• Save Time and Energy
• Professional Look with One-Click
• Streamlined Editing Process
• Very easy to use
• Instant Digital Download

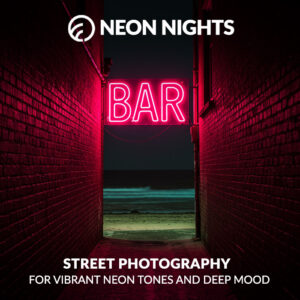
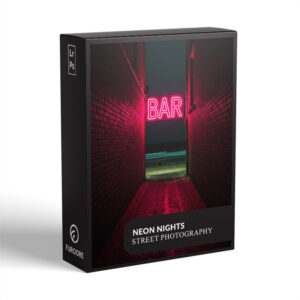
Street Photography Presets – Dramatic Streets made Easy!
The streets come alive with people, colors, lights and motion. Each city street tells a unique story, full of vibrancy, grit and humanity waiting to be captured through the lens.
Capture the vibrant soul of the city with our Street Presets! Save hours of editing and get professional street style now! Feel the pulse of the streets, intensify the drama, and take your urban photography to the next level!
What’s Included
» 16 Street Photography Presets
» 16 Clean Edit Presets
» 1x Instruction Guide (PDF)
» File formats: XMP, DNG
*16 DNG files
Free Clean Edit Presets
Use the Clean Edit Presets to make basic adjustments and set the foundation for your image. They also speed-up your workflow and offer you endless style combinations.
Compatible with:
» Adobe® Lightroom® 7.5 or later
» Adobe® Camera Raw 10.5 or later
» Adobe® Lightroom Mobile
Free eBook Street Photography
FREE EBOOK – Essential Tips for Street Photography
Capture the magic of everyday moments with street
photography. This guide equips you to embark on this exciting adventure.
Introduction
Chapter 1: Gear Up
– Comfort and Confidence: Keys to Success
– Your Pocket Powerhouse: Starting with a Smartphone
Chapter 2: Embrace the Walkabout
– The Streets: Your Playground of Endless Possibilities
– Seek the Unexpected, the Quirky, and the Stories
– Embrace the Magic of Serendipity
Chapter 3: See the Unseen
– Beyond Point and Click: Cultivating the Photographer’s Eye
– Training Your Eye: Composition, Light, and Seeing Details
– Capturing the Essence: Light, Details, and Stories
Chapter 4: Be a Fly on the Wall
– Capturing Candid Moments with Discretion
– Respect First, Photos Second
Chapter 5: Practice Makes Perfect
– Experimentation and Practice: Keys to Mastery
– Finding Your Voice: Developing Your Unique Style
Chapter 6: Embrace the Edit
– Enhancing Your Vision: A Glance at Editing Software
Final Word


These are your essentials. Now imagine having every tool for any street scene. Expand your creative palette with our full Street Photography Preset Bundle.
FAQs
How to Download the Presets?
As soon as your payment went through, you receive the download link direct by email.
How to Install Presets?
Follow the simple instructions at How to install Lightroom Presets and start using them on your desktop or mobile device.
How to use Lightroom Presets?
Street Photography Presets for Lightroom with Easy Adjustment
- The Street Photography Presets for Lightroom have been carefully made by a professional photographer. In short, they are made to look great on many different photos.
- The Presets are very easy to use with the Desktop and Mobile App version of Lightroom. In fact, you can edit amazing photos on your smartphone.
- In the first place, take a photo with your DSLR or mirrorless camera, point & shoot camera, or your smartphone. Second, upload a photo and open it in Lightroom. Third, add the preset to your photo.
- Please keep in mind that preset results can vary with each photo. For example, it can vary depending on the white balance, exposure, tones, and settings of the original photo..
- After applying a preset, you may need to apply some manual adjustments. However, you can move the filter sliders for the desired result.
- A preset may alter the skin tone of a person in your photo. In that case, use the color adjustments within Lightroom till you reach a skin tone that works for you.
- Photos that are overexposed, underexposed, or are of low-quality are not suitable for presets. In that case, you may have limited results.
How to use Clean Edit Presets?
Clean edit presets allow you to set the perfect foundation of your image by adjusting for example white balance, exposure, whites, etc. Each clean edit preset changes only one value, without overwriting other adjustments and values.
Do you have Street Photography Preset Tips?
- Understand Your Presets: Before applying a preset, it’s important to understand what adjustments it makes to your photo. This will help you choose the most suitable preset for each image and make any necessary tweaks after applying it.
- Use Presets as a Starting Point: Presets should be used as a starting point, not a one-size-fits-all solution. After applying a preset, you may still need to make additional adjustments to achieve the desired look, especially when it comes to exposure, white balance, and cropping.
- Organize Your Presets: If you have a large collection of presets, it’s important to keep them organized. This will make it easier to find the right preset when you need it. You can organize your presets by type, style, or any other criteria that makes sense to you.
- Don’t Overdo It: While presets can enhance your photos, overusing them can make your images look unnatural. It’s important to strike a balance between enhancing your photos and preserving their natural look.
- Create Your Own Presets: If you often find yourself making the same adjustments to your photos, consider creating your own presets. This can save you a lot of time and help you achieve a consistent style in your photography.
Do you have Street Photography Tips?
- Master the Art of Candid Shots: Street photography often involves capturing candid moments. Practice taking photos without drawing attention to yourself. This might involve shooting from the hip, using a small camera, or simply learning to be quick and discreet.
- Read our guides and articles to learn how to capture street photography here.
- Understand the Light: Light plays a crucial role in photography. Pay attention to the direction and quality of light. Early morning and late afternoon often provide the most dramatic light. Also, don’t shy away from shooting in harsh midday light or at night, as these conditions can create interesting and unique photos.
- Be Patient: Great street photography often comes from observing and waiting for the right moment. If you find an interesting location or scene, it might be worth waiting for the perfect subject to enter the frame.
- Get Close: Don’t be afraid to get close to your subjects. This can create a sense of intimacy and immediacy in your photos. However, always respect people’s personal space and privacy.
- Know Your Rights and Respect Others: Understand the laws regarding photography in public places in your country or the location you’re shooting. Always respect people’s privacy and be sensitive to local customs and cultures. If someone is uncomfortable being photographed, it’s usually best to move on.
‘If you can smell the street by looking at the photo, it’s a street photograph.’
Bruce Gilden
How about License/Terms?
You are not allowed to sell or redistribute to another individual and/or party in any way. You can only use these products for your personal or commercial use. This license extends to the single, individual purchaser. This license does not extend to companies or partnerships. All Presets by Furoore are copyright protected.
Due to the downloadable nature of these products, all digital sales are final sales. There are no refunds, returns, or exchanges
13 reviews for Street Photography Presets Lightroom
Add a review
You must be logged in to post a review.
• Start getting beautiful Photos in Minutes
Creating pretty photos and looking for the right tone effect can be very tough. For this reason, we at Furoore have spent countless hours for you creating Easy-edit workflow Lightroom presets.
• Quality above Quantity
We respect our customers and try our best to provide extra high-quality presets to simplify the editing. With our presets you achieve unique results in one click. You can easily adjust them to your own style or the look you are going for.
• One Time Lifetime Purchase
You only pay once to use your presets for your photos for as long as you want.


Linda B. –
As a street shootin’ mama pushing the limits of street art with my beloved Sony a7 II – these presets deliver. Plenty of options to take your urban candids next level. Heck yeah! Installation took two seconds – bam, but thats how XMP presets work. If you wanna give your street shots that beautiful bespoke butteriness, give it a try.
Phillip G. –
As an hobbyist street photographer, I’m very impressed with Furoore’s Street Photography Presets! I purchased the pack since I shoot frequently and wanted a variety of look options to stay inspired. Installing the presets into Lightroom was seamless – just one click and they were ready to use. The 40+ options range from faded vintage films looks to punchy, contrasty tones. Testing them out on some recent cityscapes, the presets gave fantastic results that would’ve taken me much longer to edit manually. I love that they provide strong, stylistic effects while maintaining a natural vibe of my original photos. Even the B&W options have good contrast and textures. The only critique is, I tend to prefer more faded, gritty tones anyway though. Overall, an extremely versatile collection of quality presets at a very fair price. These will be my go-to for editing street photography moving forward! Highly recommend them.
Andrew G. –
I got the Street Photography Presets here from the Furoore website and love them. They make my shots look great with just a few clicks.
Vincent C. –
Traveling and capturing city life, these presets are great. They offer a mix of styles and are incredibly easy to use, enhancing my photos with minimal effort.
Kellee R. –
These presets are a revelation! They beautifully capture the essence of the streets, bringing my photos to life. The variety of styles is impressive and very practical.
Clement A. –
I use these street presets for my social media content, and they never fail to impress. The way they enhance colors and textures in street scenes is remarkable. They’re easy to use and greatly reduce my editing time, while still allowing for customization. Perfect for influencers who want professional-looking content with minimal effort.
Johnette A. –
This Street Photography Presets have transformed my photography, offering an incredible array of effects that made my images with minimal effort much better. It’s a must-have for anyone serious about street photography.
Andre D. –
I am a beginner street photographer, I found the Street Photography Presets from Furoore to be a game-changer. The ease of use and the dramatic enhancement they bring to my photos with just one click is truly impressive.
Emily D. –
I shoot mostly in urban landscapes, these presets have been a game changer. The range of styles is impressive. They save me so much editing time while maintaining the natural essence of my shots. Whether I’m capturing bustling city streets or quiet alleys, these presets provide the perfect finishing touch. Highly recommend for any street photography enthusiast.
Luca P. –
These presets are a game-changer for my street photos. Easy to use and the results are stunning!
Marco S. –
These presets added incredible depth to my street photos. Super easy to use and the results are amazing!
Bernhard T. –
I’m new to photography and these lightroom presets have been a lifesaver. They bring out the best in my street shots, adding a professional touch with minimal effort. Love the variety and how they enhance the mood of each photo. I enjoy them a lot.
Clarissa G. –
Exactly what I needed for my urban shots! Overall, super happy with my purchase!