Abandoned Places Presets Lightroom
$29.90
Unlock Your Potential with our Abandoned Places Presets! They’re a great way to add a professional touch to your images without having to spend hours editing each photo manually. With our presets, you can get stunning results with just a few clicks.
• 28 Abandoned Places Presets
• Save Time and Energy
• Professional Look with One-Click
• Streamlined Editing Process
• Very easy to use
• Endless Possibilities
• Instant Digital Download
Decay never looked so good!
Abandoned Place Presets for Lightroom
Discover the secret to breathtaking abandoned places photography with our Lightroom Presets. Unleash your creativity and achieve a professional, unique look with just one click.
Our fully customizable presets are designed to work flawlessly under various light conditions, saving you time and energy. Don’t just capture moments, make them unforgettable.
Elevate your photography game today with our URBEX Lightroom Presets. Your journey to stunning images starts here.
What’s Included
» 16 Abandoned Places Presets
» 18 Free Clean Edit Presets
» 1x Instruction Guide (PDF)
» File formats: XMP, DNG
*16 DNG files
Free Clean Edit Presets
Use the Clean Edit Presets to make stackable basic adjustments and set the foundation for your image. They also speed-up your workflow and offer you endless style combinations.
Compatible with:
» Adobe® Lightroom® 7.5 or later
» Adobe® Camera Raw 10.5 or later
» Adobe® Lightroom Mobile
Abandoned Places Example Images
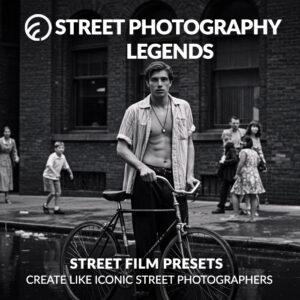
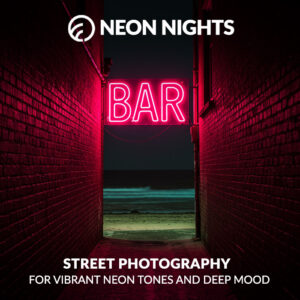
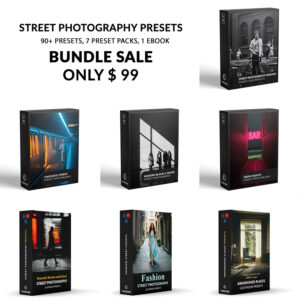
You’ve mastered the decay. Now capture the vibrant life of the city to tell the whole story. Get this pack plus 6 more in our Street Photography Preset Bundle.
FAQs
As soon as your payment went through, you get instant access to the product. In addition, you receive the download link direct by email.
Follow the simple instructions at How to install Lightroom Presets and start using them on your desktop or mobile device.
Abandoned Places Presets for Lightroom with Easy Adjustment
- The Abandoned Places Presets for Lightroom have been carefully made by a professional photographer. In short, they are made to look great on many different photos.
- The Presets are very easy to use with the Desktop and Mobile App version of Lightroom. In fact, you can edit amazing photos on your smartphone.
- In the first place, take a photo with your DSLR or mirrorless camera, point & shoot camera, or your smartphone. Second, upload a photo and open it in Lightroom. Third, add the preset to your photo.
- Please keep in mind that preset results can vary with each photo. For example, it can vary depending on the white balance, exposure, tones, and settings of the original photo..
- After applying a preset, you may need to apply some manual adjustments. However, you can move the filter sliders for the desired result.
- A preset may alter the skin tone of a person in your photo. In that case, use the color adjustments within Lightroom till you reach a skin tone that works for you.
- Photos that are overexposed, underexposed, or are of low-quality are not suitable for presets. In that case, you may have limited results.
Clean edit presets allow you to set the perfect foundation of your image by adjusting for example white balance, exposure, whites, etc. Each clean edit preset changes only one value, without overwriting other adjustments and values.
- Understand Your Presets: Before applying a preset, it’s important to understand what adjustments it makes to your photo. This will help you choose the most suitable preset for each image and make any necessary tweaks after applying it.
- Use Presets as a Starting Point: Presets should be used as a starting point, not a one-size-fits-all solution. After applying a preset, you may still need to make additional adjustments to achieve the desired look, especially when it comes to exposure, white balance, and cropping.
- Organize Your Presets: If you have a large collection of presets, it’s important to keep them organized. This will make it easier to find the right preset when you need it. You can organize your presets by type, style, or any other criteria that makes sense to you.
- Don’t Overdo It: While presets can enhance your photos, overusing them can make your images look unnatural. It’s important to strike a balance between enhancing your photos and preserving their natural look.
- Create Your Own Presets: If you often find yourself making the same adjustments to your photos, consider creating your own presets. This can save you a lot of time and help you achieve a consistent style in your photography.
Yes, Urbex photography, short for Urban Exploration photography, often involves the exploration and photography of abandoned structures or places.
This can include old factories, hospitals, schools, or any other buildings that have been left to decay. So, in essence, Urbex photography and abandoned places photography often refer to the same genre of photography.
However, it’s worth noting that Urbex photography can also extend to other urban environments that are not necessarily abandoned, but are typically off-limits or not usually seen by the public.
If you are just starting out with photography, please check also our Street photography presets here.
- Safety First: Abandoned places can be dangerous. There may be unstable structures, hazardous materials, or other risks. Always prioritize your safety and never enter a location that appears unsafe.
- Respect the Location: Leave no trace. Don’t vandalize or remove anything from the location. The goal of Urbex photography is to document these places in their current state, not to alter them.
- Research and Plan Ahead: Before visiting an abandoned location, do some research. Understand the history of the place, its current condition, and any potential legal issues. Plan your visit at a time when the lighting will be optimal for photography.
- Bring the Right Gear: Abandoned places can be dark, dusty, and dirty. Bring a sturdy tripod for long exposures, a flashlight for exploring dark areas, and protective gear like gloves and a dust mask. A wide-angle lens can be useful for capturing the full scope of large interiors.
- Tell a Story: Abandoned places are often rich in history and mystery. Try to capture this in your photos. Look for details that tell a story about the place and its past. This could be anything from peeling paint and crumbling bricks to discarded items left behind by previous inhabitants.
You are not allowed to sell or redistribute to another individual and/or party in any way. You can only use these products for your personal or commercial use. This license extends to the single, individual purchaser. This license does not extend to companies or partnerships. All Presets by Furoore are copyright protected.
Due to the downloadable nature of these products, all digital sales are final sales. There are no refunds, returns, or exchanges
9 reviews for Abandoned Places Presets Lightroom
Add a review
You must be logged in to post a review.
• Start getting beautiful Photos in Minutes
Creating pretty photos and looking for the right tone effect can be very tough. For this reason, we at Furoore have spent countless hours for you creating Easy-edit workflow Lightroom presets.
• Quality above Quantity
We respect our customers and try our best to provide extra high-quality presets to simplify the editing. With our presets you achieve unique results in one click. You can easily adjust them to your own style or the look you are going for.
• One Time Lifetime Purchase
You only pay once to use your presets for your photos for as long as you want.





Aarav B. (verified owner) –
The Abandoned Places Presets have added a whole new dimension to my urbex photography. They enhance the mood and texture of each shot brilliantly.
Malcom R. (verified owner) –
As a travel blogger focusing on abandoned sites, these presets are a great. They capture the haunting beauty of these places with just a few clicks. A must-have for anyone interested in urbex photography.
Constantin F. (verified owner) –
The presets are perfect for my projects. They add a unique, abandoned look to photos, very artistic and easy to use. Very good for creative work.
Yumi L. (verified owner) –
Presets have transformed my urbex photos into something truly special. Each preset provides a unique, atmospheric look that enhances the storytelling aspect of my photography. I can say they are user-friendly and incredibly versatile.
Jonathan E. (verified owner) –
They make abandoned place photos look very dramatic and professional. My friends are always impressed with the results. Also easy to use for different types of photos, not just urbex. Good for professional and personal use.
Amir W. (verified owner) –
I documents historical abandoned sites, these presets have been great. They enhance the mystical and abandoned atmosphere of each location.
Hannah, P (verified owner) –
These presets capture the haunting vibe of abandoned sites perfectly. They’re a staple in my adventure photography now.
Kevin G. (verified owner) –
I’m amazed by how these presets transform my urbex photos into captivating art.
Kendrick J. (verified owner) –
These presets have drastically improved my urbex photography. They add a atmospheric quality to the abandoned places I capture, making them look like scenes from a movie.